


10 Main Menu
108 Wide Format Copy System User Guide
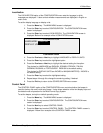
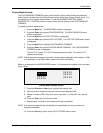
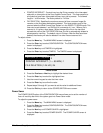
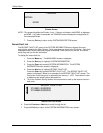
6. Press the Enter key to select COLOR IQ. The COLOR IQ screen is displayed.
IMAGE ENHANCEMENT
COLOR IQ: SRGB
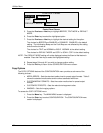
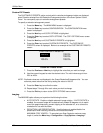
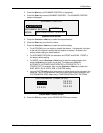
IMAGE ENHANCEMENT
COLOR IQ:
DYNAMIC BACKGROUND REMOVAL
SRGB
NORMAL MODE:
BEST IQ
9
Image Enhancement Screen
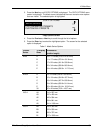
7. Press the Next key to select the enhancement option you want:
• NONE: scanned color has no color correction applied.
• SRGB: scanned colors will be converted to the SRGB (Standard Red Green
Blue) color space
• ADAPTIVE CONTRAST: scanned colors are first converted to the SRGB color
space, and then enhanced using an adaptive contrast algorithm. The adjustment
changes the images white point, black point,
NOTE: Further color halftone image enhancement can be achieved when printing by enabling
the Error Diffusion Raster Halftone Method in the controller Web Printer Management
Tool. The setting is found on the Processing Defaults page. Select Error Diffusion from
the Raster Halftone Method pull-down menu.
8. Press the Enter key to select the enhancement setting.
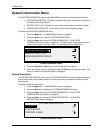
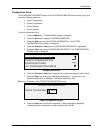
9. Press the
Next key to select NORMAL MODE then press the Enter key to select
Normal Mode.
10. Press
Previous or Next to scroll through the settings BEST IQ and FASTEST, then
press the
Enter key to select the setting. BEST IQ is the default.
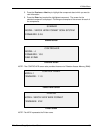
11. Press the
Next key to select DYNAMIC BACKGROUND SUPPRESSION. Then
press the
Enter key to enable/disable DYNAMIC BACKGRO UND REMOVAL.
Disabling the DYNAMIC BACKGROUND REMOVAL enables the STATIC
BACKGROUND REMOVAL. DYNAMIC BACKGROUND REMOVAL is the default
and should be used for most document types.
12. Press the
Enter key to confirm the selection.
13. Press the
Exit key to return to the CONFIGURATION menu.
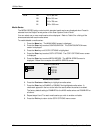
Timers
The TIMERS option of the CONFIGURATION menu allows you to set the values for the time-out
functions. Pressing any key or scanning a document resets the timers.
The timers are as follows:
• FEATURE – Controls how long the current feature parameters remain in effect after
the last key press, scan completion, or insertion of a document into the Scan System.
The FEATURE timer can be set between 0 and 99 minutes. The factory default is 5
minutes. A value of 0 means that the feature will never time out.
NOTE: To prevent images from being lost, feature time-outs will not occur during the sets build
process.