


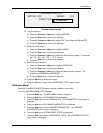


10 Main Menu
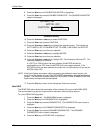
Wide Format Copy System User Guide 137
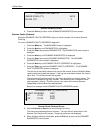
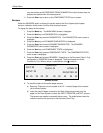
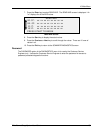
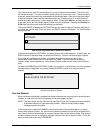
DOCUMENT MOTOR
MOTOR: OFF SPEED: .125
DIRECTION:
FORWARD
Document Motor Screen
10. Turn the motor on.
a) Press the
Previous or Next key to highlight MOTOR.
b) Press the
Enter key to confirm your selection.
c) Press the
Previous or Next key to select ON. The choices are ON and OFF.
d) Press the
Enter key to confirm your selection.
11. Select the motor speed.
a) Press the
Previous or Next key to highlight SPEED.
b) Press the
Enter key to confirm your selection.
c) Press the
Previous or Next key to select the desired motor speed. The choices
are .125, .250, .500, .750, 1, 1.5, 2, 3 and 4.
d) Press the
Enter key to confirm your selection.
12. Select the motor direction.
a) Press the
Previous or Next key to highlight DIRECTION.
b) Press the
Enter key to confirm your selection.
c) Press the
Previous or Next key to select the desired motor direction. The
choices are FORWARD and REVERSE.
d) Press the
Enter key to confirm your selection.
13. Press the
Start key to activate the motor.
14. Press the
Exit key to return to the COMPONENT TESTS menu screen.
Calibration Motor
Select the CALIBRATION MOTOR option to set the calibration zone motor.
To run the CALIBRATION MOTOR diagnostic:
1. Press the
Menu key. The MAIN MENU screen is displayed.
2. Press the
Next key until DIAGNOSTICS is highlighted.
3. Press the
Enter key to select DIAGNOSTICS. The DIAGNOSTICS menu screen is
displayed.
4. Press the
Next key until SCANNER DIAGNOSTICS is displayed.
5. Press the
Enter key to select SCANNER DIAGNOSTICS. The SCANNER
DIAGNOSTICS menu screen is displayed.
6. Press the
Next key until COMPONENT TESTS is highlighted.
7. Press the
Enter key to select COMPONENT TESTS. The COMPONENTS TESTS
menu screen is displayed.