4-26 Dell PowerEdge 6350 Systems Service Manual
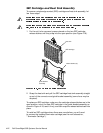
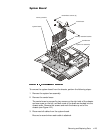
4. Remove the memory module by grasping it by the corners and pulling it up
out of its connectors.
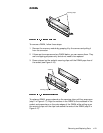
5. Remove the memory retention bracket by pulling it up out of its guides.
6. If you are migrating components (such as expansion cards, SEC cartridge/
heat sink assemblies, and/or guide bracket assemblies) to a replacement
system board, remove those components now.
Note the slot numbers of any PCI cards you are migrating to the new
system board so that you can install them in the same slots on the new
board.
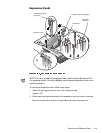
7. Loosen the thumbscrew securing the system board to the bottom of the
chassis.
8. Slide the system board toward the front of the chassis about a half an inch
to clear the chassis hooks, and remove the board.
If you are replacing the system board, install any components you removed
from the old system board onto the replacement board. To retain the same
system configuration and appropriate resource sharing, install PCI expansion
cards in the same slots they were in on the old system board. Verify that the
jumper settings on the new system board are correct.


