


Custom Printing
3-26
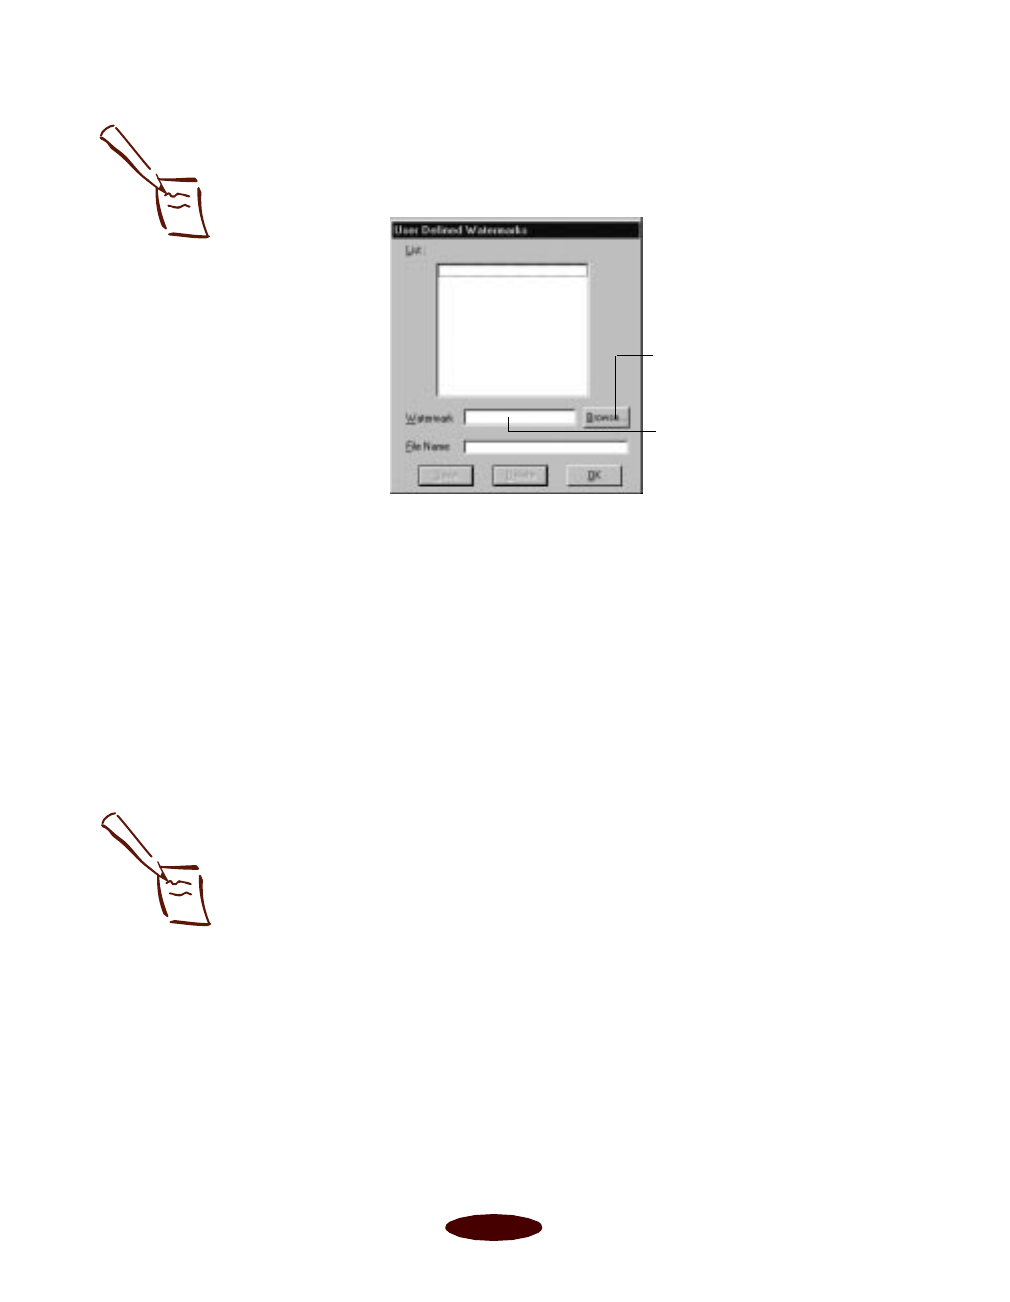
4. To load a custom watermark you’ve created as a bitmap in
an application program, click the
User Defined button.
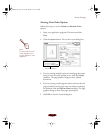
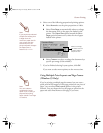
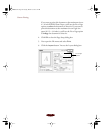
You see the following dialog box:
Click the
Browse button. You see the Select a bitmap file
dialog box. Navigate to the folder containing the bitmap
file you want to use, select the file, and click OK.
Type a name for the custom watermark (up to 24
characters long) in the
Watermark field. Click the Save
button to add it to the list, then click OK.
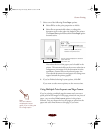
The custom watermark now appears as the selected
watermark in the Watermark Settings dialog box and is
shown in the Layout graphic.
5. Now select the way you want the watermark to appear by
choosing the following options. The Layout graphic
changes to reflect all the settings you choose.
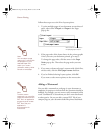
◗
Position selects where you want the watermark to
appear on your page: Center
,
Top-Left
,
Top-Right
,
Bottom-Left
, or
Bottom-Right
.
◗
Size adjusts the size of the watermark, either larger or
smaller, as you move the slide bar.
◗
Color
lets you choose a color for your predefined
watermark:
Red
,
Black
,
Blue
,
Aqua
,
Lime
,
Fuchsia
,
or
Yellow
. You cannot select a color for a custom
watermark; it is printed in its original colors.
Click Browse to select
your bitmap file
Then type a name for your
custom watermark here
and click Save
Note:
You can create up to 10
custom watermarks. In
Windows 95, you can use
any bitmap file up to
15MB in size. With
Windows NT, the file
can be any size.
To delete a custom
watermark you’ve added
to the list, click the User
Defined button. Then
select the watermark and
click Delete. Click OK to
close the dialog box.
Note:
If your monitor displays
only 16 colors, the
Intensity adjustments are
not shown in the Layout
graphic. If you choose the
No Halftoning setting, the
Intensity setting does not
determine how your
watermark is printed.
Easch3.fm5 Page 26 Tuesday, March 24, 1998 1:14 PM