


Stylus C40UX/C40SX/C20UX/C20SX Revision A
Adjustment Overview 80
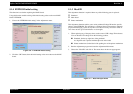
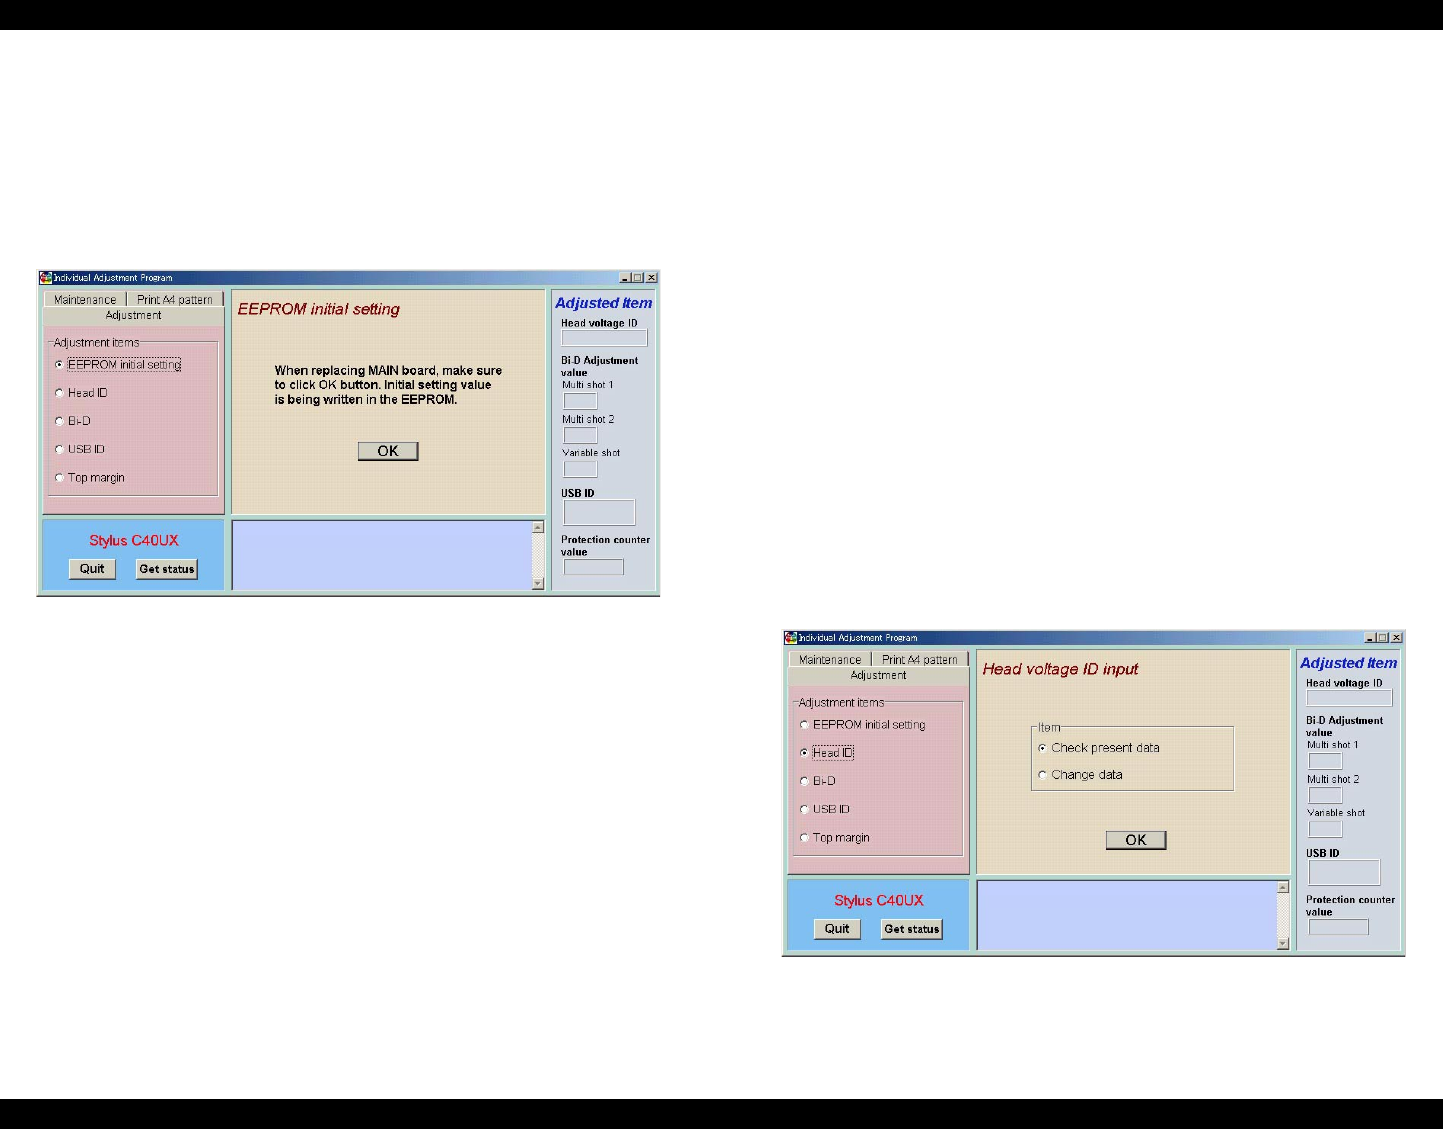
5.1.4 EEPROM initial setting
This function is used when replacing the MAIN board.
Using this function enables writing of the initial setting values to the new MAIN
board’s EEPROM.
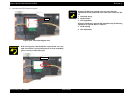
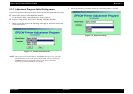
1. Choose the “EEPROM initial setting” in the Adjustment menu.
Figure 5-6. EEPROM initial setting
2. Click the “OK” button, then the initial setting values are written to the MAIN
board.
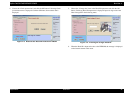
5.1.5 Head ID
This adjustment function is required when any of the following parts is replaced.
Printhead
Main board
Printer mechanism
This adjustment function enables you to write printhead Voltage ID into the specific
address of the EEPROM. This operation is considered the most important to maintain
proper ink discharging system. If any ID is not written correctly, it results in white or
color lines and also gives bad influence on dot weight.
1. When replacing any of the parts above, make a note of VH voltage ID in advance.
You can find the VH voltage ID on the following position:
Printhead: On the top right face of the printhead.
A 6-digit ID code is printed with the QR code on the label.
Printer mechanism: On the label of the packing box of the printer mechanism.
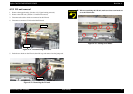
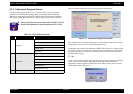
2. Run the Adjustment program and enter the Adjustment Main menu.
3. Choose the “Head ID” and click it. The menu shown in the next page appears.
Figure 5-7. Head ID input menu