


Stylus C40UX/C40SX/C20UX/C20SX Revision A
Adjustment Overview 84
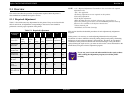
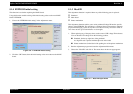
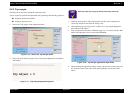
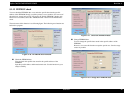
1. Choose the “USB ID input” in the Adjustment menu.
Figure 5-14. Choose the USB ID input menu
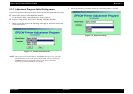
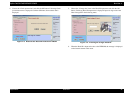
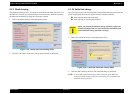
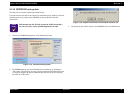
2. Choose the “Input USB ID” and click “OK” button in the “USB ID check/Input”
menu. Following menu is displayed.
Figure 5-15. Choose the USB ID input menu
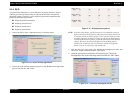
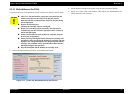
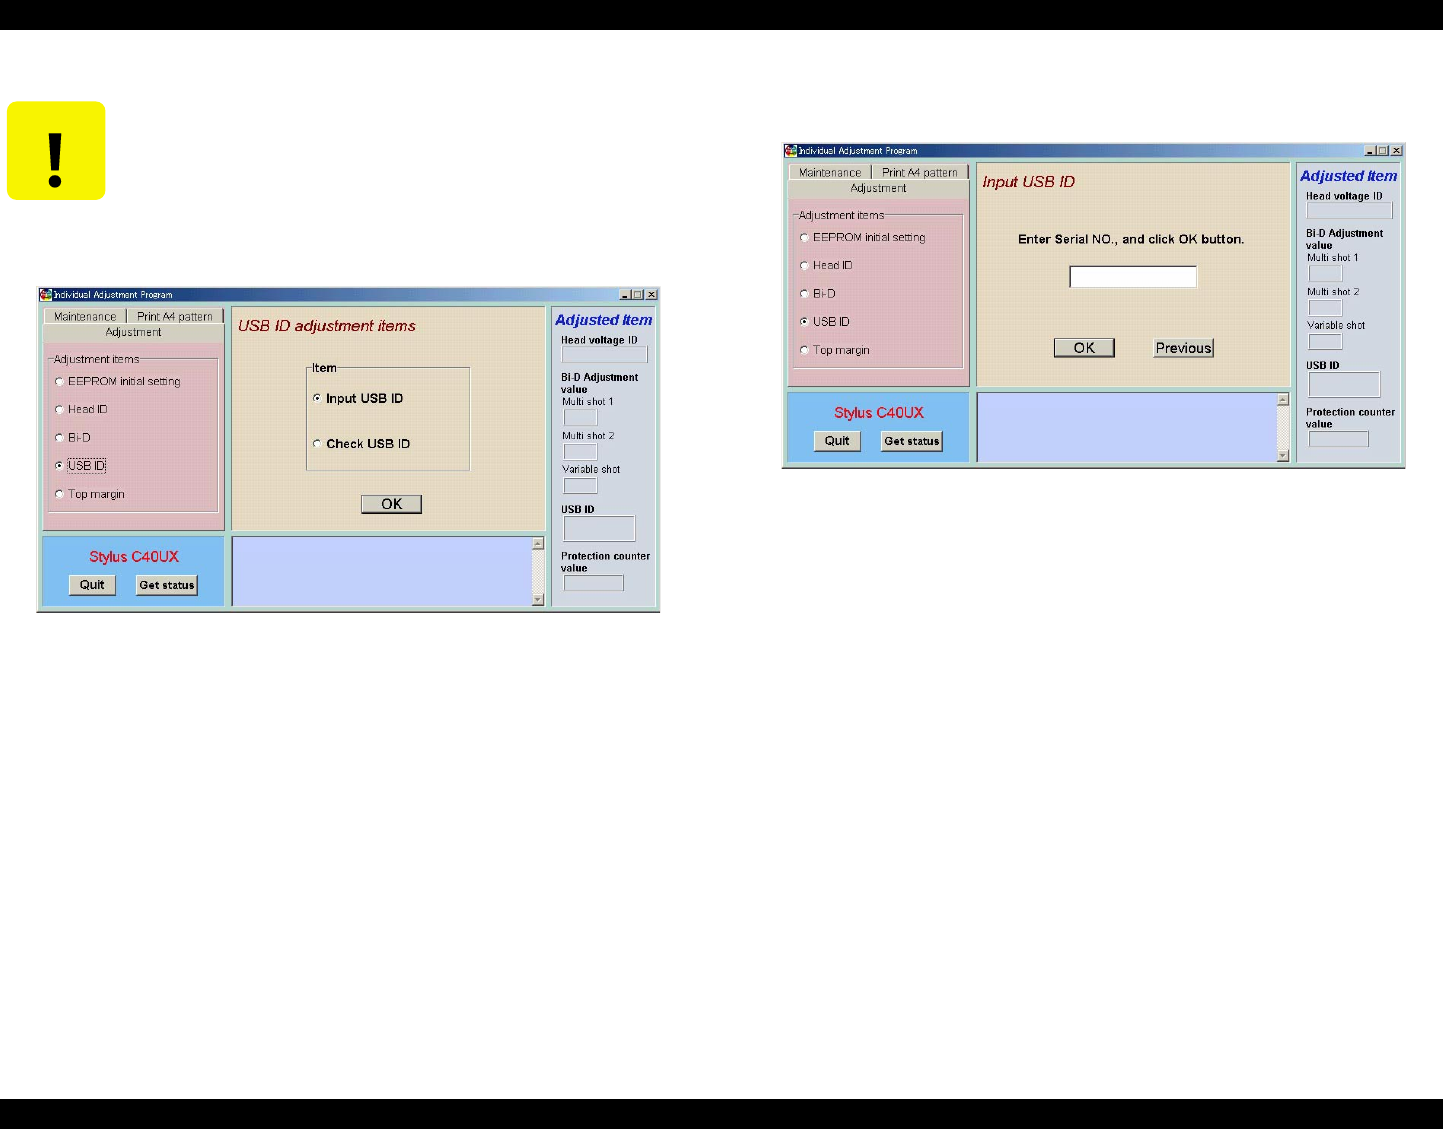
3. Check the 10digits code of the serial number on the serial number label stuck
around the rear side of the Upper housing. Input the 10digits code of the serial
number in the input menu and click “OK” button.
NOTE: Even though you input irresponsible another 10digits code and click the
“OK” button, the program allow to input the code and write down it the
specific address of the EEPROM. But, there is a possibility that the code
is not unique and the code conflicts another USB ID in the USB port
driver.
C A U T I O N
In case the USB ID is not input in the adjustment program after
the main board is replaced to new one, the USB ID may not
possibly unique one. In this case, the USB ID conflicts another
peripheral USB ID in the USB port driver and the another USB
peripheral may not possibly be used with the USB.