


Calibrating the Printer Using Windows
If you are using Windows on your PC, follow the steps below
to calibrate the printer. If you installed the Windows printer
driver, the Calibration utility is installed on your hard disk.
1. If you are using Windows 3.1, select the
EPSON Printer
Calibration
icon in the EPSON program group to start the
utility.
If you are using Windows 95, first make sure the Spool
Manager despooler is closed (not just minimized). Then
click
Start
. Point to
Programs
,
Epson
, and then click
EPSON Printer Calibration
to start the utility.
2. When you see the Printer Calibration Utility screen, select
OK
.
3. Make sure your printer is selected in the drop-down menu.
Under Calibration Item, click the radio button for the print
head you want to calibrate. The default is
Black
.
4. Click
Next
. Make sure the selected printer port is correct.
If you are not sure which port the printer is connected to,
check your print manager utility. Then click
Next
.
c
Caution:
Make sure that the printer name you selected and the
actual printer to be calibrated are the same, and confirm
that this printer is connected to the port you selected.
Otherwise, the printer will be damaged.
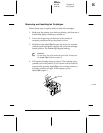
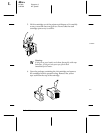
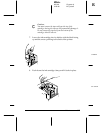
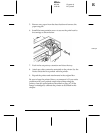
5. Make sure the printer is on and paper is loaded. Then click
Next
to print the Current Alignment Sheet.
6. Click the misaligned pattern. (If more than one pattern is
misaligned, click a misaligned pattern now. After you
finish the steps in this section, repeat steps 1 through 9 to
select and calibrate each remaining misaligned pattern.)
L
Elbe+
A5 size Chapter 6
3-25-96 MT, pass 5
6-10
Maintenance