


c
Caution:
Make sure that the printer name you selected and the
actual printer to be calibrated are the same, and confirm
that this printer is connected to the port you selected.
Otherwise, the printer will be damaged.
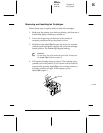
4. In the next screen, click the
Preview
button to print the
calibration patterns in the Choose pattern pull-down menu.
Use this printout to select the pattern(s) that need to be
calibrated.
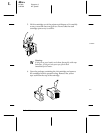
5. Look at the printed patterns, and select the misaligned
pattern in the Choose pattern pull-down menu. For
example, if the lines shown under Pattern 2 need to be
aligned, select
Pattern 2
; then click
Start
.
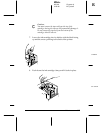
The printer prints some alignment patterns. Each pattern is
associated with an offset value. Look for the alignment
pattern that is most closely aligned.
6. After the pages have printed, you see a dialog box requesting
the number of the pattern that is most closely aligned.
Enter the appropriate number and click
OK
.
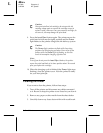
7. Repeat steps 5 and 6 until you are satisfied that all of the
patterns are aligned.
8. To close the calibration utility, click
Quit
.
9. Turn off the printer to save the settings.
Note:
The settings made with the Bi-D Calibration utility are saved only
when you turn off the printer.
R
Elbe+
A5 size Chapter 6
3-25-96 MT, pass 5
Maintenance
6-13