System Administrator Screens
312353B 43
Programming the Tank Level
Monitor
1. In the Action column of the tank record you want to
program, click Program. The Tank Level Monitor
setup timeout notice appears (F
IG. 81).
2. When the screen appears, you will have up to 5 min-
utes to program the TLM or you will need to reclick
Program. After 5 minutes, this window needs to be
manually closed. To stay in program mode at the
PC, the Program Link must be clicked again. Press
the blue button on the TLM until Program Mode is
displayed on the TLM screen (about 15 seconds).
The text on the screen will change from “PC in pro-
gramming mode” to “Program Complete” indicating
the TLM has been programmed. For more informa-
tion on the TLM see instruction manual 309500.
3. Click Cancel Programming to return to the Tank
Setup Screen and start over.
Recommendations
1. Verify that the serial link between the PC and trans-
ceiver is working. See the Confirm PC/Transceiver
Communication section on how to do this. If this
link is not working, nothing else will.
2. Tank level monitors come from the factory with
exactly the same factory default configura-
tion—including the RF settings the tank level moni-
tors use to communicate to the PC via the
transceiver. Therefore, when trying to program one
tank level monitor, another tank level monitor may
interfere. Particularly when commissioning a system
for the first time, remove the batteries from all tank
level monitors except the one you’re programming.
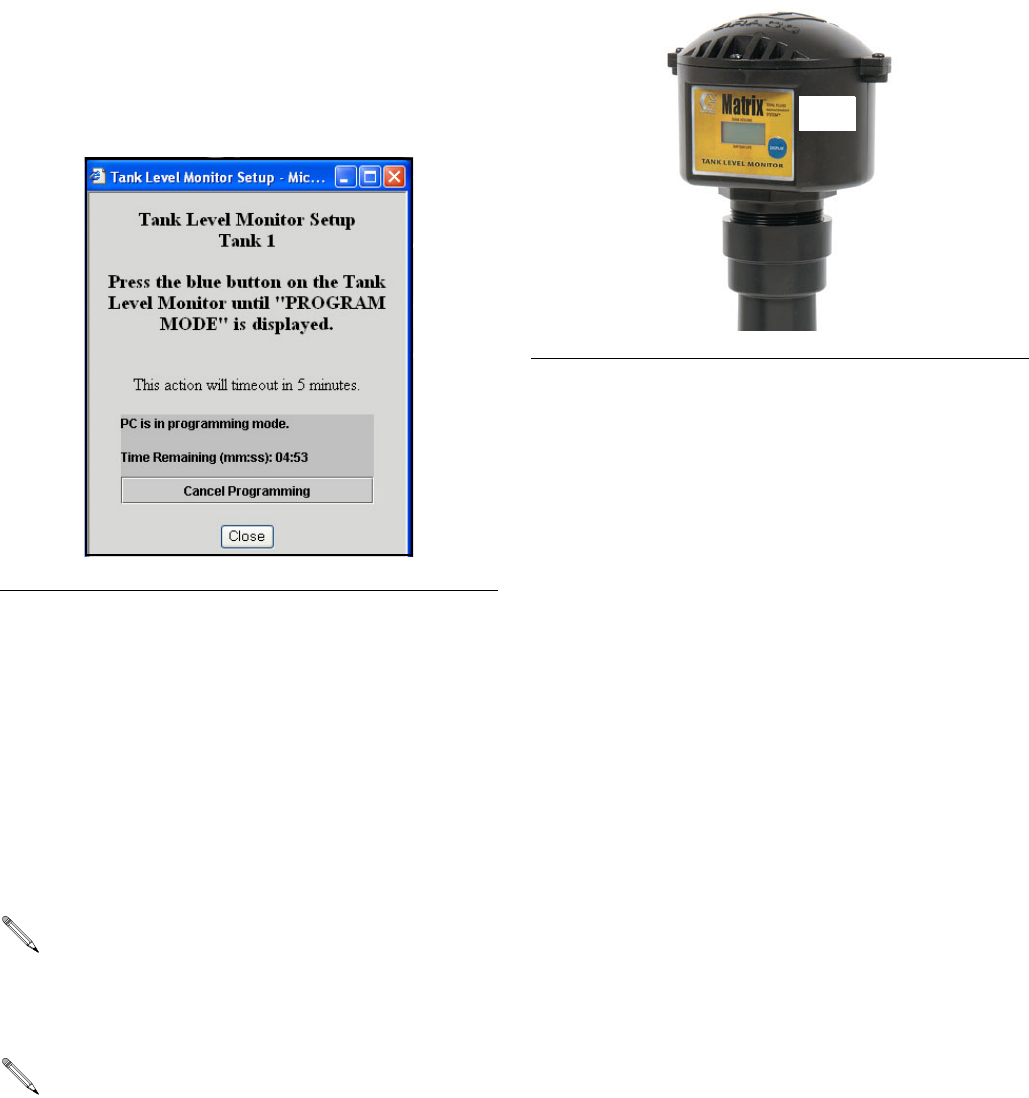
F
IG. 81 Tank Level Monitor Setup
Remove the protective plastic covering from the
tank level monitor display.
After programming is completed, label each moni-
tor with the tank number and fluid name (i.e., Tank
1, 5W30). The label can be removed after the mon-
itor is installed in the tank (F
IG. 82).
If a programmed TLM is moved to another tank
location or if the parameters change, it must be
re-programmed.
FIG. 82
5W-30
Tank 1


