228 J.D. Edwards’ OneWorld B73.3 and Windows Terminal Server
5. Verify that this form lists all the necessary locations for your plan. From the
action bar click Form > Configure (the Workbench updates your Detail Status
to 60 and changes the Status Description from Validated to Installed).
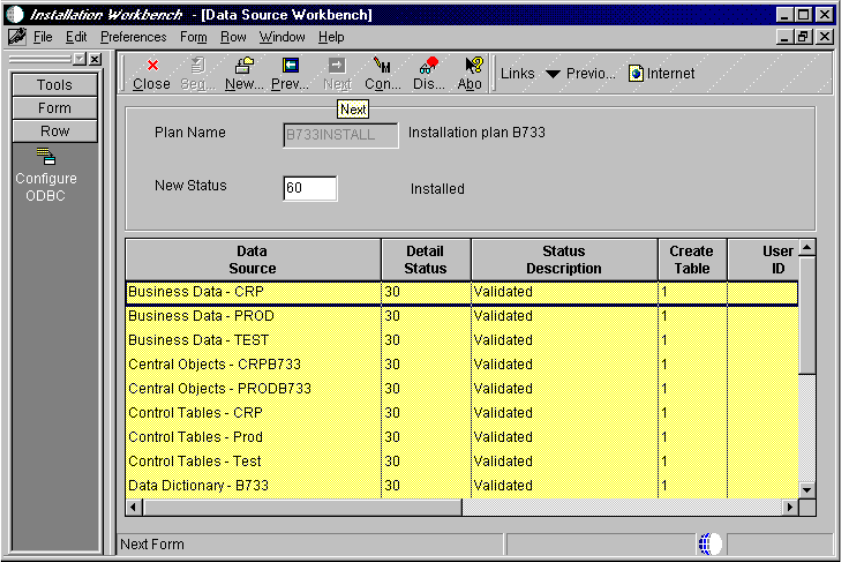
6. Click Next to continue. You will see a screen similar to Figure 184:
Figure 184. Data Source Workbench Screen
7. At the Data Source Workbench screen, we scrolled down the list of items and
verify that the information presented lists all the necessary data sources for
our plan.
Note: If you are using SQL Server data sources, you must create ODBC data
sources defined in the plan that were not created earlier (at the beginning of
the Installation Planner). As you complete the next steps, if the option appears
for you to create a new data source take a look at the bottom left corner of the
screen to determine which data source must be created. This information will
appear in the screen where Next Form is currently shown in Figure 184.
8. From the action bar click Form > Configure (this will update your Detail
Status to 60 and changes the Status Description from Validated to Installed).
9. Click Next to continue. You will see a screen similar to Figure 185 on page
229.


