


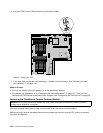
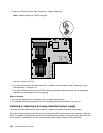

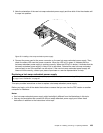
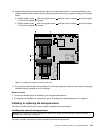
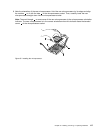

6. If you are replacing a heat sink, remove the four screws that secure the heat sink to the system board. It
is recommended that you carefully remove the four screws from the system board using the following
method to avoid any possible damage to the system board.
a. Partially remove screw 1 , then completely remove screw 3 , and then return to screw 1 and
completely remove it.
b. Partially remove screw 2 , then completely remove screw 4 , and then return to screw 2 and
completely remove it.
Note: The four screws are integrated parts of the heat sink. Do not try to remove the four screws
from the heat sink.
Figure 60. Removing the screws that secure the heat sink
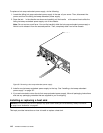
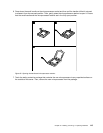
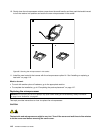
7. Gently twist the heat sink to free it from the microprocessor and then lift the heat sink off the system
board.
8. Lay aside the old heat sink. Touch the static-protective package that contains the new heat sink to any
unpainted surface on the outside of the server. Then, take the new heat sink out of the package.
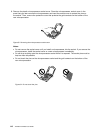
Notes:
• If you are replacing a heat sink, you need to use a cleaning pad that might come with the new heat
sink to wipe the thermal grease from the top of the microprocessor before installing the new heat
sink. Dispose of the cleaning pad after all of the thermal grease is removed from the microprocessor.
• When handling the new heat sink, do not touch the thermal grease on the bottom of it.
9. Remove any protective cover that protects the thermal grease on the bottom of the new heat sink. Then,
place the new heat sink on the system board so that the four screws on the new heat sink are aligned
with the corresponding mounting studs on the system board.
112 ThinkServer RD330 User Guide