


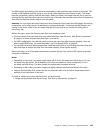
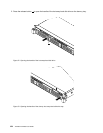
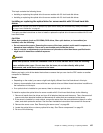
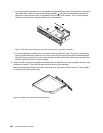
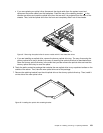

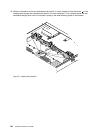

• If you are replacing an optical drive, disconnect the signal cable from the system board and
disconnect the power cable from the backplane. Press the rear of the retaining bracket 1 in the
direction as shown and push the optical drive from the rear until it is projected from the front of the
chassis. Then, hold the optical drive from the front and completely slide it out of the chassis.
PSU
Mem
CPU
ID
Figure 81. Removing the optical drive for server models with 2.5-inch hard disk drives
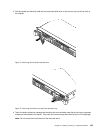
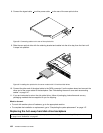
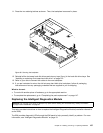
• If you are installing an optical drive, remove the dummy optical drive tray. The way of removing the
dummy optical drive tray is similar to the way of removing the optical drive that is described above.
Store the dummy optical drive tray in the event that you later remove the optical drive and need the
dummy optical drive tray to cover the place.
6. Touch the static-protective package that contains the new optical drive to any unpainted surface on the
outside of the server. Then, take the new optical drive out of the package.
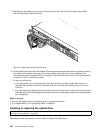
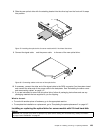
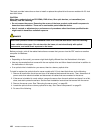
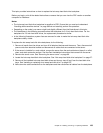
7. Remove the retaining bracket from the old optical drive or the dummy optical drive tray. Then, install it
on the side of the new optical drive.
Figure 82. Installing the optical drive retaining bracket
Chapter 6. Installing, removing, or replacing hardware 131