


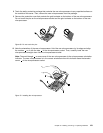

8. Touch the static-protective package that contains the new microprocessor to any unpainted surface on
the outside of the server. Then, remove the new microprocessor from the package.
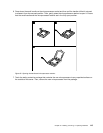
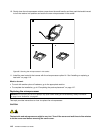
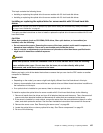
9. Remove the protective cover that protects the gold contacts on the bottom of the new microprocessor.
Do not touch the pins on the microprocessor socket and the gold contacts on the bottom of the new
microprocessor.
Figure 69. Do not touch the pins
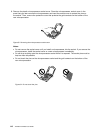
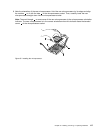
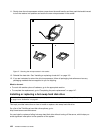
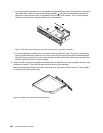
10. Note the orientation of the new microprocessor. Hold the new microprocessor by its edges and align
the notches 1 on it with the tabs 2 in the microprocessor socket. Then, carefully lower the new
microprocessor straight down into the microprocessor socket.
Note: The small triangle 3 on one corner of the new microprocessor is the microprocessor orientation
indicator. The new microprocessor is in the correct orientation when this indicator faces the beveled
corner
4 of the microprocessor socket.
Figure 70. Installing the microprocessor
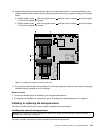
Chapter 6. Installing, removing, or replacing hardware 121