


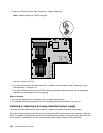


Depending on the model, your server might come with one or two microprocessors. For server models with
one microprocessor, the microprocessor is installed in the microprocessor socket 1 and the microprocessor
socket 2 is protected by a plastic socket cover. You can purchase a microprocessor option kit from Lenovo
and install the second microprocessor to expand system capabilities.
CAUTION:
Turn off the server and wait three to ve minutes to let the server cool before removing the server
cover.
Before you begin, print all the related instructions or ensure that you can view the PDF version on another
computer for reference.
Notes:
• Ensure that you install the correct type of microprocessor option your server supports. See “Memory
module installation rules” on page 75
. When two microprocessors are installed, both must have the same
core voltage and core speed.
• Use any documentation that comes with the microprocessor option kit and follow those instructions in
addition to the instructions in this topic.
• Your microprocessor, socket, and socket cover might look slightly different from the illustrations in this
topic.
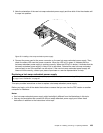
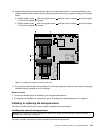
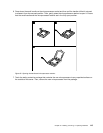
To install the second microprocessor, do the following:
1. Remove all media from the drives and turn off all attached devices and the server. Then, disconnect all
power cords from electrical outlets and disconnect all cables that are connected to the server.
2. If the server is installed in a rack cabinet, remove the server from the rack cabinet and place it on a at,
clean, and static-protective surface. See the Rack Installation Instructions that comes with the server.
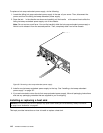
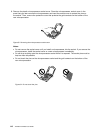
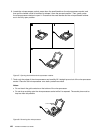
3. Remove the server cover. See “Removing the server cover” on page 69.
4. Remove the cooling shroud. See “Removing and reinstalling the cooling shroud” on page 73.
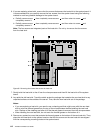
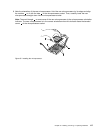
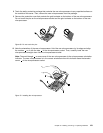
5. Locate the microprocessor socket 2 on the system board. See “System board components” on page 31.
114 ThinkServer RD330 User Guide