Using a PictBridge-enabled digital camera to control printing photos
You can connect a PictBridge-enabled digital camera to the printer, and use the buttons on the camera to control
and print photos.
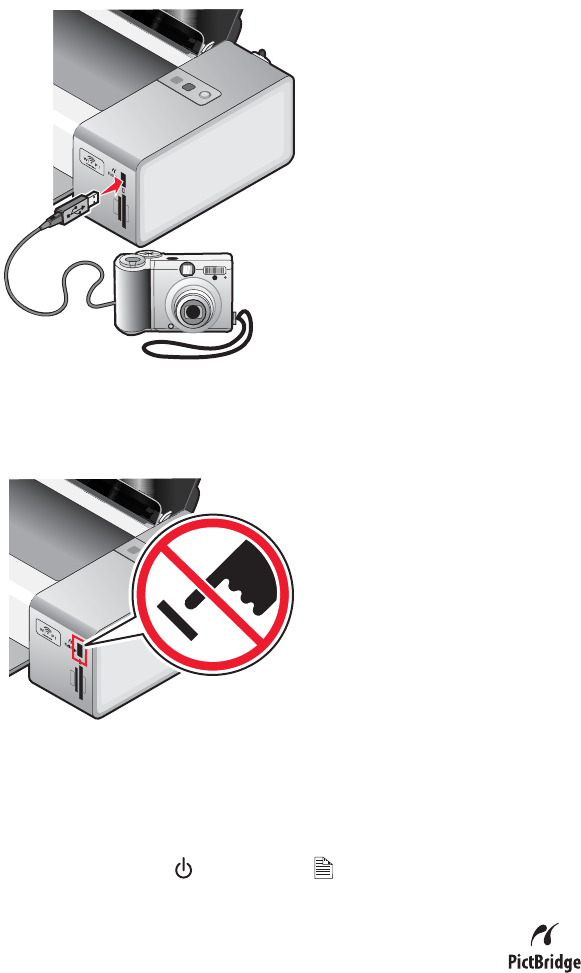
1 Insert one end of the USB cable into the camera.
2 Insert the other end of the cable into the PictBridge port on the front of the printer.
Warning: Do not touch the USB cable, any network adapter, or the printer in the area shown while actively
printing from a PictBridge-enabled digital camera. A loss of data can occur. Also, do not remove the USB cable
or network adapter while actively printing from a PictBridge-enabled digital camera.
Notes:
• Make sure the PictBridge-enabled digital camera is set to the correct USB mode. For more information, see
the documentation that came with your camera.
• The printer recognizes one active media device at a time. If you have a memory card already inserted when
you connect a PictBridge-enabled digital camera, the
light and the
A
light blink alternately until the
memory card is removed or the camera is unplugged.
3 If the PictBridge connection is successful, the camera automatically switches to print mode, the
PictBridge symbol appears on the camera display, or a message recognizing the connection appears on the
camera display, depending on your camera.
For more information, see the documentation that came with your camera.
4 Follow the instructions in the documentation that came with your camera to select and print photos.
Working with photos
37


