9
9.3 Using Scan to E-mail Operations
9-58
Internet Fax & Network Scan Chapter 9
❍ If settings such as the subject, cc recipient, and resolution are not
to be specified, press the [Start] key instead of the [Yes] key, and
skip to step 10.
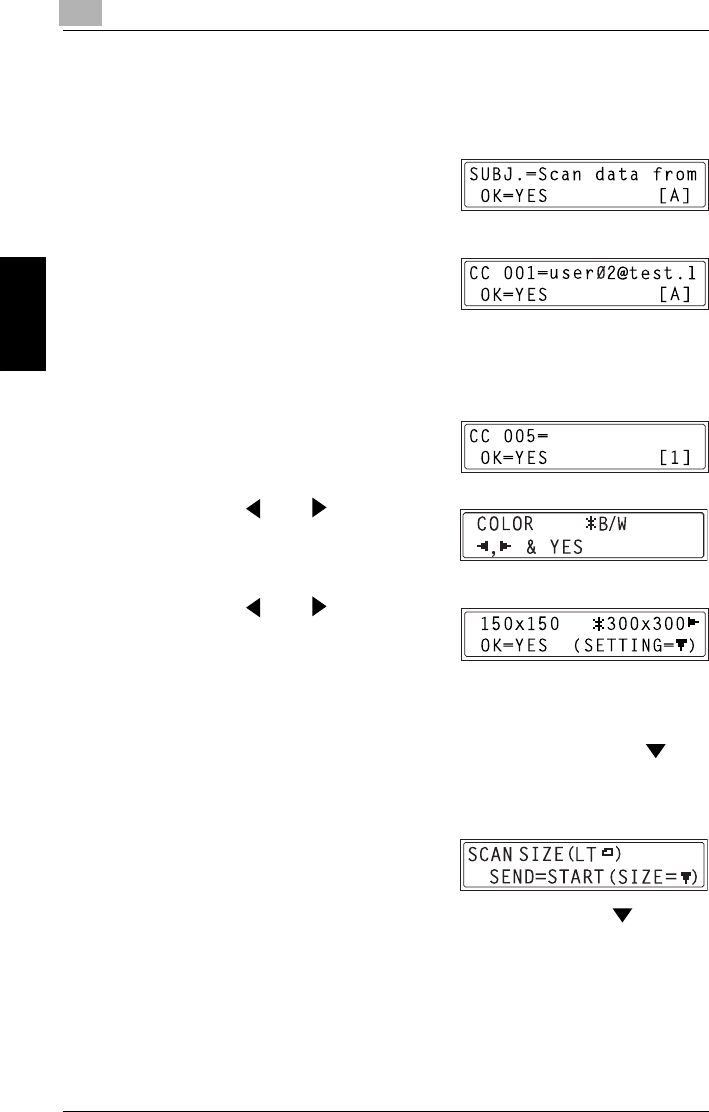
5 Enter a title (subject), and then
press the [Yes] key.
6 Enter the e-mail address for any
additional recipient, and then press
the [Yes] key.
❍ To specify more then one CC address, press the [Yes] key to enter
the additional addresses. Repeat step 6 until all of the recipients
have been specified.
7 After you have finished specifying
the addresses for additional
recipients, press the [Yes] key.
8 Press the and keys to select
the color mode (“COLOR” or “B/W”),
and then press the [Yes] key.
9 Press the and keys to select
the resolution (150× 150 dpi,
300× 300 dpi, or 600× 600 dpi), and
then press the [Yes] key.
❍ The 600×600 dpi resolution cannot be selected if “COLOR” was
selected as the scan mode in step 8.
❍ To specify detailed settings for the scan mode, press the key.
❍ For information on specifying detailed settings, refer to “Changing
the Scan Mode Settings” on page 9-59.
10 Press the [Start] key.
Scanning starts, and then the scan
data is sent to the recipients.
❍ To change the size of the scanned image, press the key.
❍ For information on changing the size, refer to “Changing the
Scanned Image Size” on page 9-60.


