


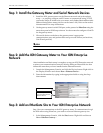

ION 7500 / ION 7600 User’s Guide Step 1: Install the Gateway Meter and Serial Network Devices
The ION Meter as an Ethernet Gateway Technical Note Page 339
Step 1: Install the Gateway Meter and Serial Network Devices
1. Install the ION gateway meter on the Ethernet network and perform basic
setup — to properly configure an ION meter to communicate using TCP/IP
you need a unique IP Address for your meter, and a Subnet Mask address (this
address distinguishes among devices on the same LAN). Refer to the meter’s
documentation for setup instructions.
2. On the gateway meter’s serial COM port, set the protocol to EtherGate using the
meter front panel or ION Setup software. You do not need to configure a Unit ID
for the gateway meter.
3. Wire serial devices on the bus to the gateway meter’s appropriate
communications port, and perform basic setup on each of these (set baud rate,
Unit ID and protocol).
NOTE
Each device connected on the serial network must have a unique Unit ID.
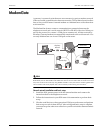
Step 2: Add the ION Gateway Meter to Your ION Enterprise
Network
After installation and basic setup is complete, set up your ION Enterprise network
to mirror your communications network. Start by adding an Ethernet device that
defines the meter that you have installed on the Ethernet network.
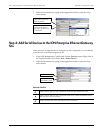
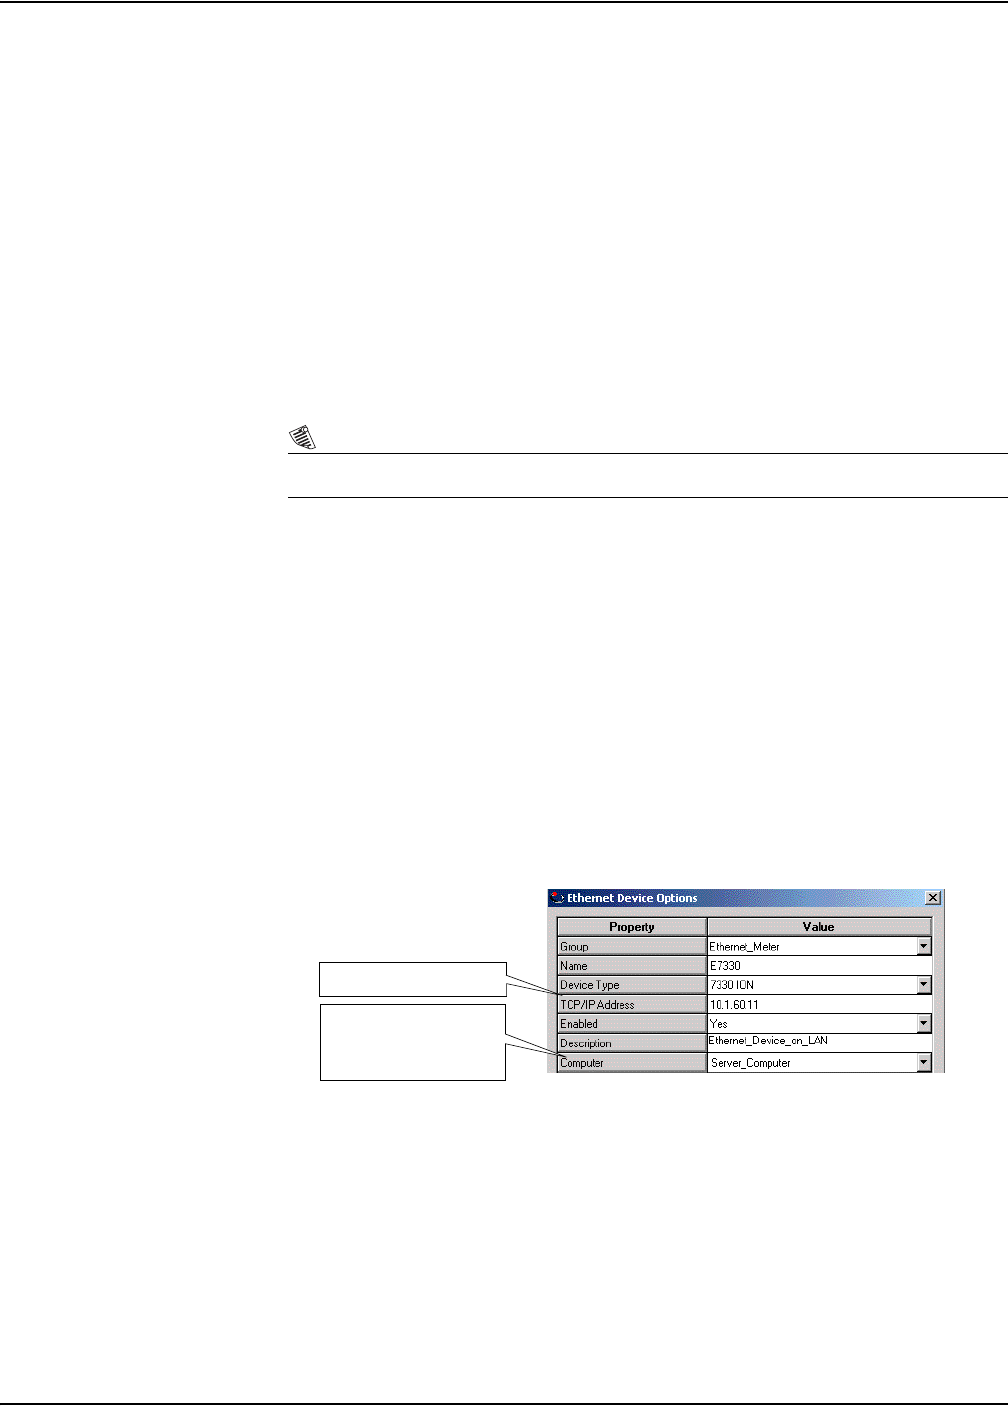
1. Launch the Management Console, and click the Devices button. Right-click in
the Display Window and choose New > Ethernet Device...
2. Enter the information by typing in the appropriate fields or using the drop-
down menus.
Step 3: Add an EtherGate Site to Your ION Enterprise Network
Step 1 lets you communicate to the ION gateway meter. To communicate through
the ION meter using EtherGate, you need to create an Ethernet gateway site.
1. In the Management Console, click the Sites button. Right-click and choose
New > Ethernet Gateway...
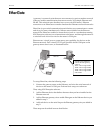
Meter TCP/IP Address
Server computer that
communicates with the
Ethernet device