Configuring Your Machine > 66
Setting the Fax Features
Initial Set Up
The following parameters must be set before using the fax function on your unit:
•Time zone
• Date and time
There are other parameters that can be adjusted to suit your personal preferences later if
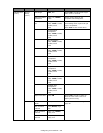
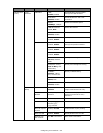
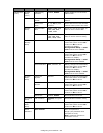
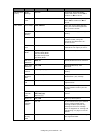
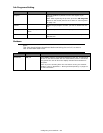
required, refer to fax set up table for details (See “Advanced Set Up” on page 66.).
To set fax parameters:
1. Press the Setup button on the control panel.
2. From the touch screen, press the Admin Setup button.
3. Using the on-screen keyboard, enter the admin password and press Enter.
4. From the touch screen, press the User Install button.
5. Select Time Zone and using the on-screen arrows or keypad, set the correct time
differential.
6. If required, press Set Daylight Saving and select ON.
7. Select Time Setup and using the on-screen arrows or keypad, set the correct date
and time.
8. Press Enter to confirm.
9. Press Enter to enable.
Advanced Set Up
Your machine offers a multitude of features which reduce the time required for manual
operation and make fax communications more efficient.
NOTE
If you ran the driver installer program from the CD-ROM you may have already
set the time zone, date and time via the Panel Downloader utility.
NOTE
If connecting the machine through a private branch exchange (PBX) line, you
must also specify a dial prefix to allow the machine to obtain an external line
before dialling. Refer to “Connecting to a PBX” on page 69.


