


30 Configuring the SMART Hub SE240
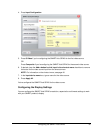
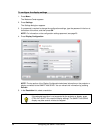
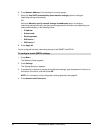
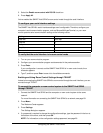
6. Press Network Address (if this tab doesn’t currently appear).
7. Select the Use DHCP (automatically detect network settings) option to configure
networking settings automatically.
OR
Select the Manually specify network settings and addresses option to configure
networking settings manually, and then type the appropriate information (as supplied by your
network administrator) in the following boxes:
– IP address
– Subnet mask
– Default gateway
– DNS server 1
– DNS server 2
8. Press Apply All.
You’ve configured the basic networking settings of the SMART Hub SE240.
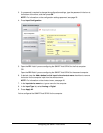
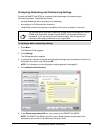
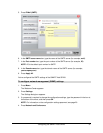
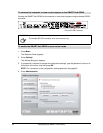
1. Press Menu.
The Welcome Center appears.
2. Press Settings.
The Settings dialog box appears.
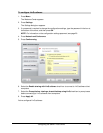
3. If a password is required to change the configuration settings, type the password in the box at
the bottom of the menu, and then press OK.
NOTE: For information on the configuration settings password, see page 20.
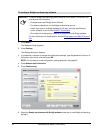
4. Press Network and Conference.
To configure e-mail (SMTP) settings