


Configuring the SMART Hub SE240 35
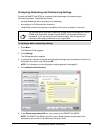
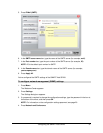
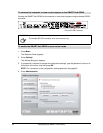
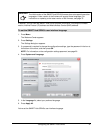
7. In the Bridgit server box, type the URL of the Bridgit conferencing software server (for
example, bridgit.yourcompany.com).
8. In the Default conference box, type a default, easy-to-identify name for all Bridgit software
conferences created with the SMART Hub SE240.
9. In the Viewing password box, type a password that participants must enter to view Bridgit
software conferences created with the SMART Hub SE240.
10. In the Creation Password box, type a password that participants must enter to create Bridgit
software conferences with the SMART Hub SE240.
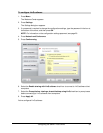
11. Press Apply All.
You’ve configured Bridgit conferencing software.
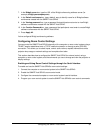
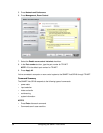
Configuring Room Control Settings
You can control the SMART Hub SE240 externally with a computer or room control system using a
TELNET session established over a TCP/IP network connection or through a serial (RS-232)
connection. This allows you to select inputs, control audio volume, request information such as
projector lamp usage or network settings and complete other tasks.
This section describes how to configure the SMART Hub SE240 for external control using a
computer or room control system, and the commands you use to change and view the projector or
display settings.
Enabling and Using Room Control Settings through the Serial Interface
To enable and use the SMART Hub SE240’s room control settings:
1. Connect the computer or room control system to the SMART Hub SE240.
2. Enable the SMART Hub SE240’s room control mode.
3. Configure the connected computer or room control system’s serial interface.
4. Program your room control system to use the SMART Hub SE240’s room control commands.