


45
Operation
Q1 A 4F : 3 S
Q1 A 4F : 3 S
*
*
*
*
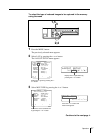
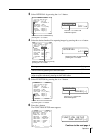
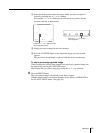
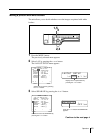
1 Select the third position where the image which you want to replace is
located by pressing the F, f, G or g button.
Pressing the F, f, G or g button moves the cursor one position by one
position vertically or horizontally.
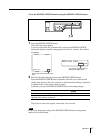
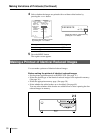
2 Display the source image on the video monitor.
3 Press the CAPTURE button at the instant the image you want to print
appears.
The previously stored image is replaced with the newly stored image.
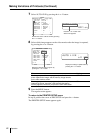
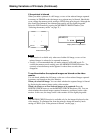
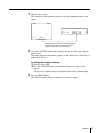
To skip a previously captured image
When an image has already been captured, the previously captured image can
be replaced by pressing the CAPTURE button.
Skip images that you want to keep by pressing the F, f, G or g button.
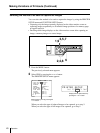
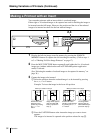
5 Press the PRINT button.
The four reduced images are printed on one sheet of paper.
Whether white borders are attached depends on the setting of SEPARATE in
the LAYOUT SETUP menu. (See page 49.)
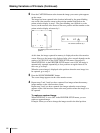
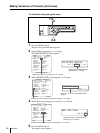
Press the F, f, G or g button
until a 3 appears.
Press the F, f, G or g button until the
third cursor blinks green.