


81
Installation and Adjustment
S
PRN
[
>
]
YSTEM
SETUP
SETUP
SYSTEM SETUP
LCD - CONTR : 7
BAUDRATE : / 24 / 4800 / 96
BEEP : OFF / ON
APPLI. : STANDARD /
IRE : 100 / 11 / 12 / 13
SAVE USER : 1 / 2 / 3 [ EXEC ]
PRN SETUP : PRESS [ > ]
USER NAME : PRESS [ > ]
Q1 A 1
S
COLOR : 200
PRN SPEED : / HIGH
MOTION CHK
P
/c/ l /PRN/i /o/
RINTER SETUP
PRINTER SETUP COLOR : 200
/ COL / LAY / PRN / IN / OUT /
PRINT QTY. : 1 [ 1 ~ 9 ]
INTERVAL : OFF / ON
GAMMA : S / NORMAL / H
: OFF / ON
LOAD USER : 1 / 2 / 3 [ EXEC ]
SYSTEM : PRESS [ > ]
FUNCTION : PRESS [ > ]
C - BALANCE : PRESS [ > ]
Q1 A 1
S
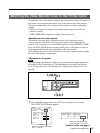
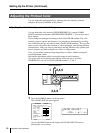
Compensating for the level of the input signal
The images displayed on the video monitor (in EE mode, see page 84) or printouts
still may be whitish due to poor contrast adjustment, even if AGC for the input
signal is compensated. In such a case, you can adjust the contrast by adjusting
GAIN in the INPUT SETUP menu. However, if you do not want to change the
contrast of the video monitor screen, compensate for the level of the input signal in
the SYSTEM SETUP menu.
Note
You cannot adjust an image once it has been captured in memory. Capture an
image after compensating for the level of the signal input.
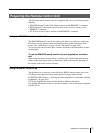
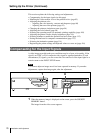
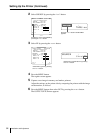
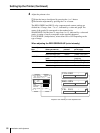
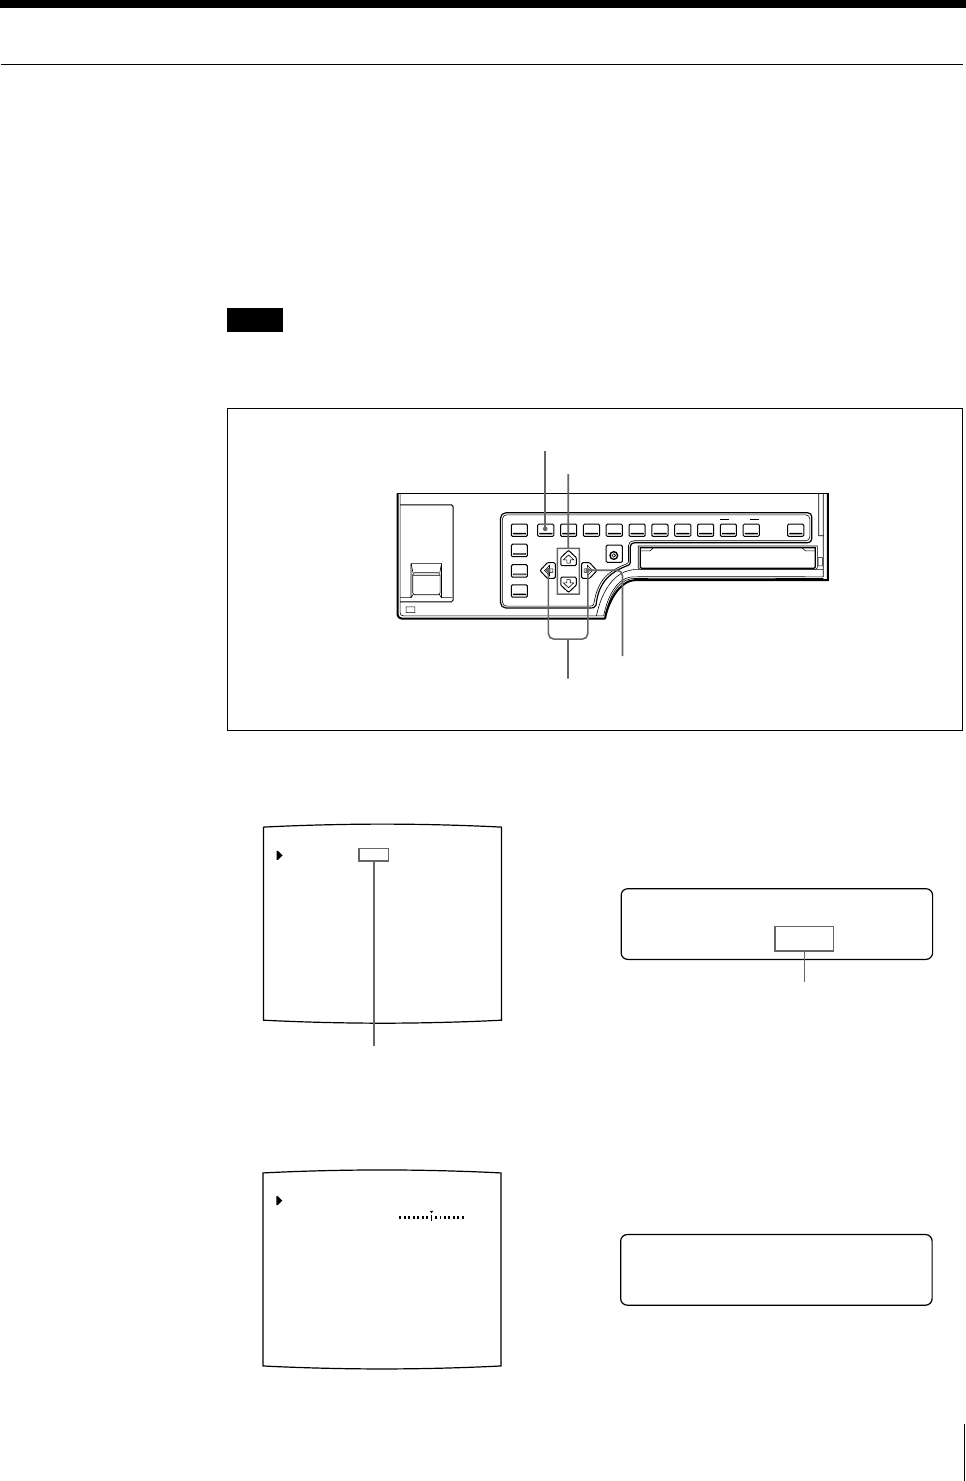
1 Press the MENU button, then select PRN by pressing the G or g button.
The PRINTER SETUP menu appears.
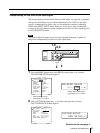
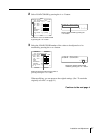
2 Select SYSTEM by using the F or f button, then press the g button.
The SYSTEM SETUP menu appears.
1,5
2,3
4
2
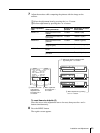
Switch PRN to green by
pressing the G or g button.
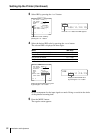
Display PRN in capital letters
by pressing the G or g button.
Continue to the next page c