


5-30 Modifying Your Vanguard 7300
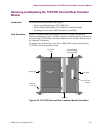
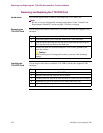
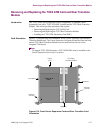
Removing and Replacing the T3/E3 ATM Card and Rear Transition Module
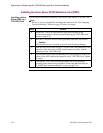
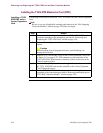
Installing the T3/E3 ATM Mezzanine Card (PMC)
Installing a T3/E3
ATM PMC onto a
Carrier Expansion
Card
Use the steps in this table to install the T3/E3 ATM PMC onto the Carrier Expansion
Card.
Note
Be sure to review all applicable warnings and cautions in the “Hot-Swapping
Cards and Modules” section on page 5-2 before you begin.
Step Action
1 Remove the Carrier Expansion Card for the T3/E3 ATM PMC from the
enclosure according to the instructions provided in “Removing and
Replacing the T3/E3 ATM Card” section on page 5-28.
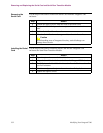
2 Place the Carrier Expansion Card on a clean, grounded, and static-free
surface.
Caution
Avoid touching areas of integrated circuitry; static discharge can
damage these circuits.
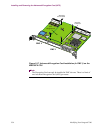
3 Place the T3/E3 ATM PMC on top of the Carrier Expansion Card (refer
to Figure 5-15 on page 5-27). The connectors on the underside of the
T3/E3 ATM PMC should connect smoothly with the connectors on the
Carrier Expansion Card.
4 Insert the short phillips-head screws through the holes at the corners of
the T3/E3 ATM PMC and into the standoffs on the Carrier Expansion
Card. Tighten the screws.
5 Install the T3/E3 ATM Card into the correct slot on the enclosure
according to the instructions provided in “Removing and Replacing the
T3/E3 Rear Transition Module” section on page 5-29.