


SNA IPDS and SCS Printing from MVS or VM
Xerox 4500 PS ETH, Inst. & Operator's Guide
132
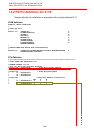
The following definitions are based on an assumption that the SAA server
is already up and running. If this is not the case, please refer to the
appropriate NetWare documentation before proceeding with the following.
1. Log in to the NetWare server running NetWare for SAA as supervisor.
2. Run SYSTEM\CSCON\cscon.exe and choose the appropriate SAA server.
It is also possible to configure via SAA Administrator for Windows.
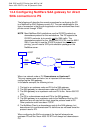
3. Choose Configure Data Link Adapters.
You will now be able to choose between one or more adapters. Note
the name of the adapter that should be used when communicating from
the SAA gateway to the Xerox 4500 PS ETH, i.e. the adapter used for
the same physical network as the Xerox 4500 PS ETH connects to.
If only one adapter is listed, you may have to create the missing
adapter. Unless this is done, the Xerox 4500 PS ETH has to be located
on the same LAN as the upstream node. In an installation resembling
the figure above, this means that the Xerox 4500 PS ETH can only be
found by SAA on the Ethernet side, NOT on the Token Ring side.
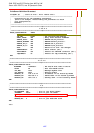
Names and numbers for network adapters can be found in the
autoexec.ncf file on the same server.
The entries look like this:
load TOKEN name=TOKEN_IP port=A20 int=2 frame=TOKEN-RING_SNAP
load 3c5x9 port=300 frame=ETHERNET_802.2 name=ETHER1
To create the missing adapter:
a) Press <Insert>
b) Type <Name> (i.e. ETHERNET) <Enter>
c) Choose <adapter type> (i.e. Token Ring) <enter>
d) Type <Number> (note that each adapter needs a separate number)
e) Press <ESC>
f ) Choose <YES> to create Data Link Adapter Definition
4. Choose Configure for Host Connections
You can now use an existing PU profile or you can add a new profile.
Multiple PU profiles can be active at the same time. This configures the
connection to the Host. The following describes the creation of a new
PU profile.
a) Press <Insert>
b) Enter <New Profile Name> e.g. IDAPROF