


XEROX WIDE FORMAT COPY SYSTEM Main Menu • 101
the media guidelines on the Feed-in Tray. The width sensors
eliminate the need for a prescan thereby increasing the
overall throughput of the system resulting in higher
productivity. When this feature is used the operator must
select the media series, ANSI, ARCH, ISO A, ISO B JIS B
and CUSTOM etc since the number of sensors provided can
not monitor every media type.
To use the MODE: PRODUCTIVITY: CUSTOM the custom
sizes must be entered in the CUSTOM MEDIA FORMATS
(Menu, CONFIGURATION>COPY OPTIONS).
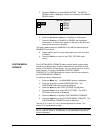
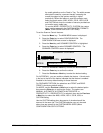
To set the Scanner Control features:
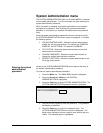
1. Press the Menu key. The MAIN MENU screen is displayed.
2. Press the Enter key to select CONFIGURATION. The
CONFIGURATION menu screen is displayed.
3. Press the Next key until SCANNER CONTROL is highlighted.
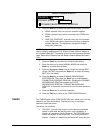
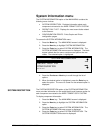
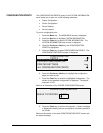
4. Press the Enter key to select SCANNER CONTROL. The
SCANNER CONTROL screen is displayed.
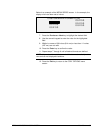
SCANNER CONTROL
DOCUMENT RETURN:
AUTOSCAN
MODE:
4
FRONT
PRODUCTIVITY — ANSI
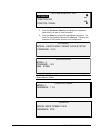
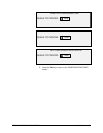
5. Press the Previous or Next key to select the desired feature.
6. Press the Enter key to confirm the choice.
7. Press the Previous or Next key to select the desired setting.
For AUTOSCAN, , you can enable or disable the feature. A check mark
in the box to the left of the feature indicates that the feature is enabled.
Enabled is the factory default setting for these features.
For DOCUMENT RETURN, the selections are FRONT and REAR.
FRONT is the factory default setting.
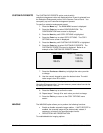
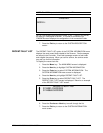
For MODE: use the Previous or Next keys to select the desired option
then press the Enter key to confirm the choice.. The options are
MANUAL, AUTOWIDTH, AUTOWIDTH/AUTOCENTER, or
PRODUCTIVITY. If PRODUCTIVITY is selected, then use the Previous
or Next key too select the ANSI, ARCH, ISO A, ISO B, JISB, or
CUSTOM setting.
Use the CUSTOM setting when documents of mixed series will be
scanned in the same job. The CUSTOM selection can only be used
when sizes are entered in the CUSTOM MEDIA SIZES (Menu
CONFIGURATION>COPY OPTIONS.