


82 •Scanning to the Network (SCAN mode) XEROX WIDE FORMAT COPY SYSTEM
automatically. For more information, refer to the AccXES Client Tools
User Guide.
Other remote retrieval programs can use the File Transfer Protocol (FTP)
to retrieve and delete files from the WIDE FORMAT COPY SYSTEM
hard disk over the network. These other programs will copy the files
rather than move them, so the files remain on the local hard disk after
retrieval.
After a file has been on the local hard disk for longer than the time
specified for the FILE DELETION Timer, the system automatically
deletes the file. Refer to the Main Menu, CONFIGURATION menu,
TIMERS section of this manual for information about setting the FILE
DELETION timer.
Switching between COPY mode and
SCAN mode
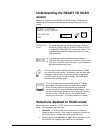
NOTE: The COPY mode will be disabled and the READY TO COPY
screen will not be accessible when a color printer is connected to the
Controller.
To switch between the COPY mode and the SCAN mode, perform the
following steps:
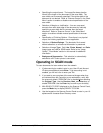
1. Ensure that the READY TO COPY screen is displayed. If a
menu is displayed, press the Menu key to return to the READY
screen. If PLEASE ENTER ACCOUNT is displayed, enter a
valid User ID code then enter a valid account number to obtain
the READY screen.
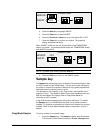
2. Press the Mode key. The system switches to the SCAN mode
and the screen now displays. Pressing the Mode key again
returns the system to the COPY mode.
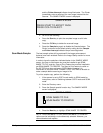
PLEASE ENTER
DIRECTORY
Images
3. Enter a Directory name, up to 16 alphanumeric characters, to
which you will scan the images. The name cannot begin with a
period/decimal point.
NOTE: The TCP/IP network protocol must be enabled in the Controller
or the WIDE FORMAT COPY SYSTEM will not enter the SCAN mode.
To enable the TCP/IP protocol, refer to the Controller Setup Manual.