


78 •Special features keys XEROX WIDE FORMAT COPY SYSTEM
and the Printer Interrupt indicator lamp illuminates. The Printer
immediately prints a sample of the next image inserted into the
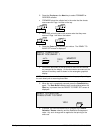
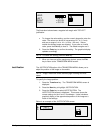
Scanner. The SAMPLE MODE screen is displayed.
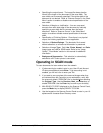
SAMPLE MODE
PRESS START TO ACCEPT PAGE.
PRESS C/CA TO REJECT.
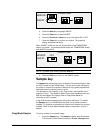
2. Do one of the following:
• Press the Start key to print the complete image as a full-size
copy.
• Press the C/CA key to delete the scanned image.
3. Press the Sample key again to disable the Sample feature. The
Printer is returned to the default priority setting and the Sample
and Printer Interrupt indicator lamps are extinguished.
The best sample prints will be produced if the image enhancement
features have been enabled. Refer to the Image Quality section for more
information.
In order to have the selections indicated below in the SAMPLE MODE
screen, the Scan-to-Net feature key must be installed to get SCAN
IMAGE TO FILE, and the Scan-to-Print Feature key must be installed to
get SCAN IMAGE TO PRINTER. The Scan-to Print feature is useful on
the X2 TECH that does not have a COPY Mode. However it is
convenient on the other WIDE FORMAT COPY SYSTEMS to be able to
make a sample before scanning an image to file.
To print a sample copy, perform the following:
1. If the scanner is set to COPY mode switch to SCAN mode for
instructions, refer to “Switching between COPY mode and SCAN
mode”
2. Enter the Directory name.
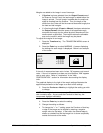
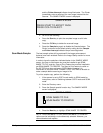
3. Press the Sample special function key. The SAMPLE MODE
screen is displayed.
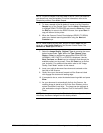
SAMPLE MODE
4
SCAN IMAGE TO FILE
SCAN IMAGE TO PRINTER
4. Press the Next key to highlight SCAN IMAGE TO PRINTER.
NOTE: The SCAN IMAGE TO FILE and SCAN IMAGE TO PRINTER
options can be individually or simultaneously selected. However, you
cannot deselect both options
Scan Mode Sample: