


XEROX WIDE FORMAT COPY SYSTEM Scanning to the Network (SCAN mode) • 85
NOTE: To print a Sample in the next Step on an X2 TECH, the Scan-to-
print feature key must be installed. For more information, refer to the
Sample key section, Scan Mode Sample.
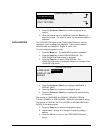
5. To view a sample of the file before it is scan to a file, Press the
Sample key on the Control Panel. Use the Next or Previous key
to highlight SCAN TO PRINTER and press the Enter key. Press
the Exit key to return to the READY screen, then press Start. A
copy will be sent to the printer.
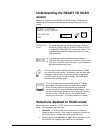
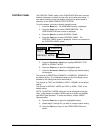
6. When the Scanner Control Panel displays READY TO SCAN,
select your desired scanning resolution using the Next and
Previous keys.
NOTE: When making a color scan, be sure to select Color with the
arrow key under Image Quality on the Scanner Control Panel. The
Normal and Photo lights will be on.
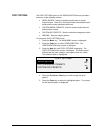
7. Select the Image Quality, Original, Type by pressing the arrow
button located under Type. When the Type (Normal, Line,
Photo,or Color) is selected the appropriate SCAN OPTION
(NORMAL, LINE, PHOTO, or COLOR) is displayed. Use the
Next, Previous, and Enter keys to navigate to and through the
avaliable options on the screen. Press the Enter key to confirm
your choice(s). For additional information refer to the "Image
Quality, Scan Mode" section of this manual.
8. Insert your original document face down and centered on the
feed tray of the Scanner.
9. Gently move your document forward until the Scanner's feed
rolls engage the document's leading edge.
10. If prompted to do so, enter the desired scanning width and press
Enter.
11. As your document is automatically fed into the Scanner, the
resulting image is stored as a file in the Scan Directory on the
system Controller's hard drive. The image can be retrieved at
your workstation using the Retrieve Tool of the AccXES Client
Tools.
NOTE: You may have to press the Start button if the configuration (for
Auto Scan) has been changed from the factory default.