


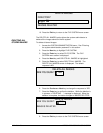

120 •Main Menu XEROX WIDE FORMAT COPY SYSTEM
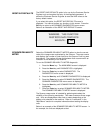
FULL SYSTEM TEST
A) B)
C) D) E)
F)
G)
H) I)
PRESS START TO BEGIN
Nine sub-tests are included in the system test. Each letter on the screen
corresponds to a sub-test as follows:
a) Post Test 5 - NVM (Non Volatile Memory) Verification
b) Post Test 6 - Motor Communications
c) Post Test 7 - SCVM Code Checksum
d) Post Test 8 - SCVM (Scanner Virtual Memory) Load and Functional
Test
e) Post Test 9 - Pixel Magic Interface
f) Post Test A - Pixel Magic Internal
g) Post Test B - Video Path
h) Post Test C - 24 VDC (Volts Direct Current) Power Supply Test
i) Post Test D - Lamp
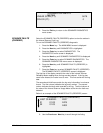
8. Press the Start key to begin the system test. While the tests are
executing, the bottom display line changes to "RUNNING."
At the completion of the tests, the test results are displayed. If a sub-test
is successful, a "P" is displayed. If a sub-test fails, an "F" is displayed. If
an "F" is displayed the test has failed and service is required.
9. Press the Exit key to return to the SCANNER DIAGNOSTICS
menu screen.
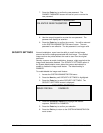
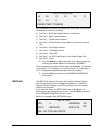
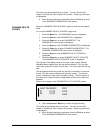
The WRITE NVR option is for use by the Customer Service Engineer
only and requires the entry of the diagnostic password. It allows the
Customer Service Engineer to modify the contents of the non-volatile
memory of the Scanner.
If you select this option, the WRITE NVR screen is displayed. You
cannot perform any functions in this screen. Press the Exit key to return
to the SCANNER DIAGNOSTICS menu screen.
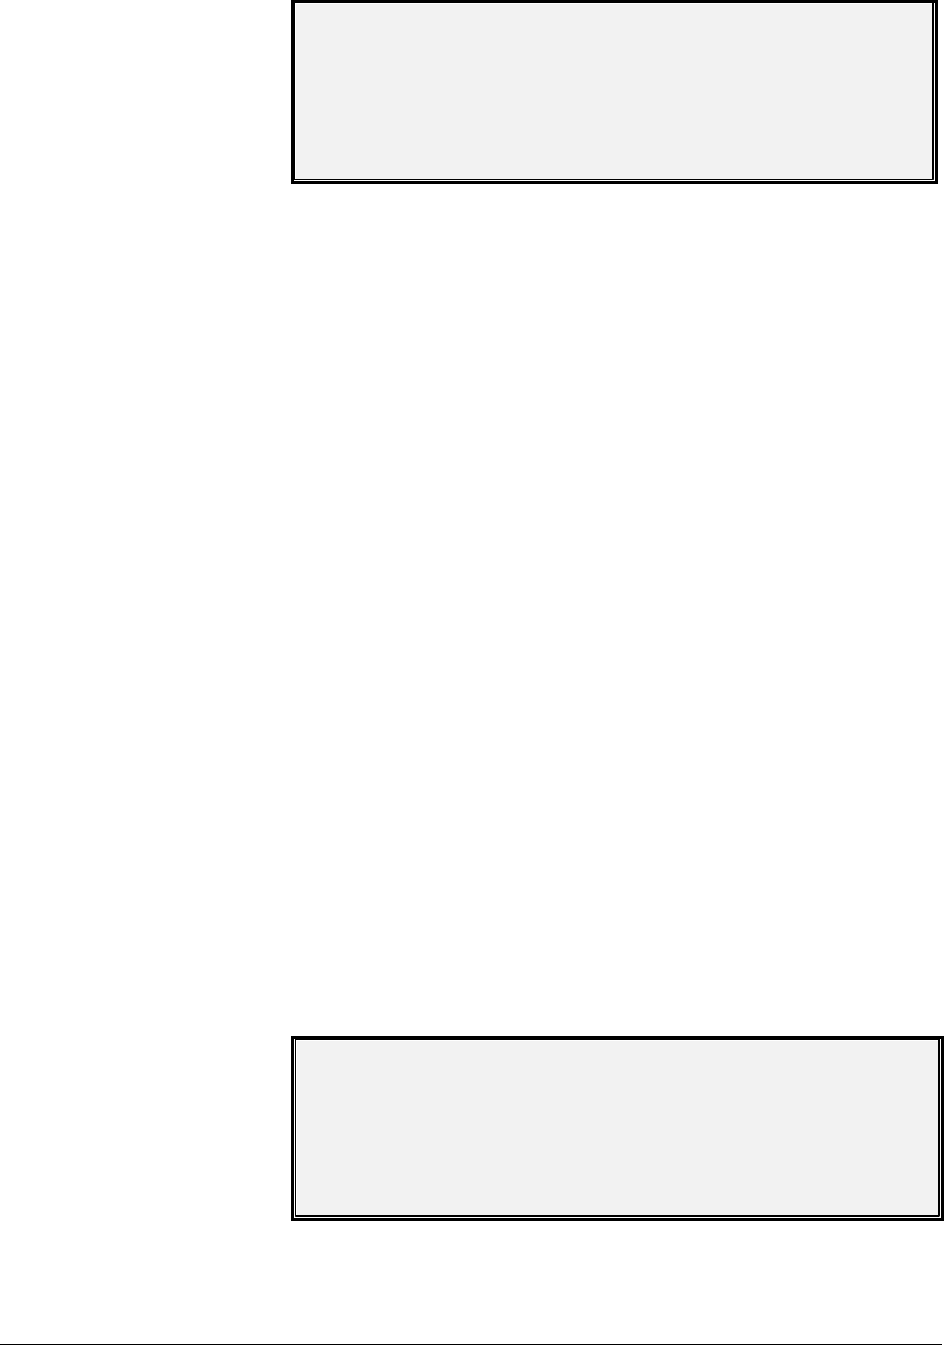
Below is an example of the WRITE NVR screen.
WRITE NVR
SIZE: 4
ADDRESS:
D0
DATA:
ABCD4321
EXECUTE:
NO
USE . KEY FOR HEX DIGITS
WRITE NVR