


Configuring Groups and VLANs for a Server NIC
49
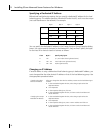
Creating a VLAN
1 Click the VLANs tab.
2 In the VLANs window, select a NIC or group from the VLANs list and click
Create VLAN.
3 In the VLAN ID dialog box, type a VLAN ID number and click OK.
Valid VLAN ID numbers are from 1 – 511 and from 768 – 4095. Numbers in the range
512 – 767 are reserved.
The new VLAN is added to the VLANs list.
Windows 2000—If you create more than one VLAN, assign a VLAN ID number to
each VLAN as follows:
■ Right-click My Network Places and select Properties from the menu.
■ In the next window, right-click a VLAN and select Properties from the menu.
■ Click Configure.
■ In the NIC Properties window, click TCP/IP.
■ In the next window, configure the IP address and subnet mask.
Windows NT—Restart the computer when the software prompts you to do so.
Specifying Traffic Priorities
You can use the DynamicAccess Software Setup window to specify traffic priorities.
1 Double-click the 3Com DynamicAccess icon in the Windows Control Panel.
The DynamicAccess Software Setup window appears.
2 Click the appropriate tab:
■ Traffic Prioritization—Prioritize applications to ease bottlenecks in the network
and allow critical applications to take network precedence. You can turn traffic
prioritization on or off independently for each:
■ NIC that is not in a group and does not have VLANs
■ Group that does not have VLANs
■ VLAN
■ Virtual NIC (NIC, group, or VLAN) shown in the Traffic Prioritization control panel
■ Administration—Set 3Com Advanced Server control panel access, set VLAN options,
enable efficient multicast control, and enable the prioritizing of multicast traffic.
Saving the Configuration
To save and exit, click OK.
A prompt asks whether you want to configure traffic prioritization. If you click Yes, the
DynamicAccess Software Setup window appears.
To exit without saving the configuration, click Cancel.