


Upgrading Modero Firmware
88
1200V Modero Video Touch Panels
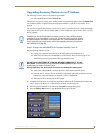
Step 2: Upgrade the NXA-BASE/B firmware via USB
1.
Complete the procedures outlined in the Step 1: Configure the panel for a USB Connection
Type section on page 79.
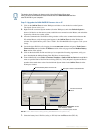
2. Prepare NetLinx Studio for communication to the panel via a Virtual Master by following the
procedures outlined in the Step 2: Prepare NetLinx Studio for communication via the USB
port section on page 80.
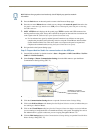
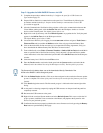
3. After the Communication Verification dialog window verifies active communication between the
Virtual Master and the panel, click the OnLine Tree tab in the Workspace window to view the
devices on the Virtual System. The default System value is one.
4. Right-click on the System entry and select Refresh System to re-populate the list. Verify the panel
appears in the OnLine Tree tab of the Workspace window.
The default Modero panel value is 10001.
5. Locate the latest Kit file by first logging in to www.amx.com and then navigate to Tech Center >
Firmware Files and from within the Modero section of the web page locate the Battery Base.
6. Click on the desired Kit file link and after you’ve accepted the Licensing Agreement, verify you
have downloaded the Modero Battery Base Kit file to a known location.
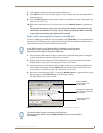
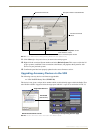
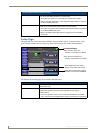
7. From within Studio, select Tools > Firmware Transfers > Send to NetLinx Device from the Main
menu to open the Send to NetLinx Device dialog. Verify the panel’s System and Device number
values match those values listed within the System folder in the OnLine Tree tab of the Workspace
window.
8. Select the battery base’s Kit file from the Files section.
9. Enter the Device number associated with the panel and the System number associated with the
Master (listed in the OnLine Tree tab of the Workspace window). The Port field is greyed-out.
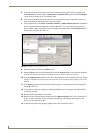
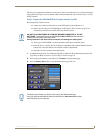
10. Click the Reboot Device checkbox. This causes the touch panel to reboot after the firmware update
process is complete. The reboot of the panel can take up 30 seconds after the firmware process has
finished.
11. Click Send to begin the transfer. The file transfer progress is indicated on the bottom-right of the
dialog.
12. As the panel is rebooting, temporarily unplug the USB connector on the panel until the panel has
completely restarted.
13. Reconnect the USB connector to the panel.
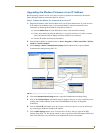
14. Right-click the associated System number and select Refresh System. This causes a refresh of all
project systems, establishes a new connection to the Master, and populates the System list with
devices on your particular system.
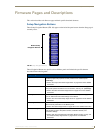
15. Confirm the base has been properly updated to the correct firmware version by pressing the Battery
Base button to open the Battery Base page.
The firmware for the battery base can not be downloaded directly. Download of the
Kit file to the BASE/1 is done through the panel.