


Configuring the Firewall
Configuring Access Rules
Cisco RV130/130W Wireless Multifunction VPN Router Administration Guide 90
5
Adding Access Rules
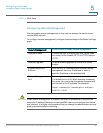
All configured firewall rules on the device are displayed in the Access Rules
Table. This list also indicates whether the rule is enabled (active) and gives a
summary of the From/To zone as well as the services and users the rule affects.
To create an access rule:
STEP 1 Choose Firewall > Access Rules.
STEP 2 Click Add Row.
STEP 3 In the Connection Type field, choose the source of originating traffic:
• Outbound (LAN > WAN)—Choose this option to create an outbound rule.
• Inbound (WAN > LAN)—Choose this option to create an inbound rule.
• Inbound (WAN > DMZ)—Choose this option to create an inbound rule.
STEP 4 From the Action drop-down menu, choose the action:
• Always Block—Always block the selected type of traffic.
• Always Allow—Never block the selected type of traffic.
• Block by schedule—Blocks the selected type of traffic according to a
schedule.
• Allow by schedule—Allows the selected type of traffic according to a
schedule.
STEP 5 From the Services drop-down menu, choose the service to allow or block for this
rule. Choose All Traffic to allow the rule to apply to all applications and services,
or choose a single application to block:
• Domain Name System (DNS), UDP or TCP
• File Transfer Protocol (FTP)
• Hyptertext Transfer Protocol (HTTP)
• Secure Hypertext Transfer Protocol (HTTPS)
• Trivial File Transfer Protocol (TFTP)
• Internet Message Access Protocol (IMAP)
• Network News Transport Protocol (NNTP)