Configuring IPv6 653
interface or through something like a bit error test. For this reason, IP packets may still be
addressed to an interface in Loopback state. To facilitate this, such interfaces are advertised in
router- LSAs as single host routes, whose destination is the IP interface address.
–
Waiting
— The router is trying to determine the identity of the (Backup) Designated Router for
the network by monitoring received Hello Packets. The router is not allowed to elect a Backup
Designated Router or a Designated Router until it transitions out of Waiting state. This prevents
unnecessary changes of (Backup) Designated Router.
•
Designated Router
— This router is itself the Designated Router on the attached network.
Adjacencies are established to all other routers attached to the network. The router must also originate
a network-LSA for the network node. The network- LSA contains links to all routers (including the
Designated Router itself) attached to the network.
•
Backup Designated Router
— This router is itself the Backup Designated Router on the attached
network. It is promoted to Designated Router if the present Designated Router fails. The router
establishes adjacencies to all other routers attached to the network. The Backup Designated Router
performs slightly different functions during the Flooding Procedure, as compared to the Designated
Router.
•
Other Designated Router
— The interface is connected to a broadcast or NBMA network on which
other routers have been selected to be the Designated Router and Backup Designated Router either.
The router attempts to form adjacencies to both the Designated Router and the Backup Designated
Router.
•
Metric Cost
— Enter the value on this interface for the cost TOS (type of service). The range for the
metric cost is between 1 and 65,535. Metric Cost is only configurable if OSPFv3 is initialized on the
interface.
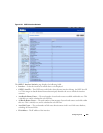
Configuring an OSPFv3 Interface
1.
Open the
OSPFv3 Interface Configuration
page.
2.
Select the Interface on which you want OSPFv3 configured.
3.
Modify the remaining fields as needed.
4.
Click
Apply Changes
.
The interface is configured for OSPFv3, and the device is updated.
Configuring an OSPFv3 Interface Using CLI Commands
For information about the CLI commands that perform this function, see the following chapter in the
CLI Reference Guide
:
• OSPFv3 Commands
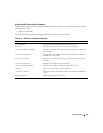
The following table summarizes the equivalent CLI commands for this feature.


