Configuring Your Epic 880
TM
Printer
100-88002 Rev B Page 39
Configuration Mode Overview
There are two ways to configure the Epic 880
TM
printer: the first is to use the manual
configuration sequence by using the CONFIG and FEED key, and the second is to
use TransAct’s remote configuration software. TransAct Technologies offers the use
of a remote CONFIG program as a fast, easy way for system integrators to configure
or reconfigure your Epic 880
TM
printer. To obtain more information, or the latest
version of the CONFIG program, call TransAct’s Sales Department or Technical
Support.
Most Frequent Configuration Incompatibilities
• Emulation
• RS-232 Serial Interface (baud rate)
How to Change Configuration Settings
Entering into Configuration Mode
1) Press the CONFIG
4
button for approximately 4 seconds.
2) Select configuration mode.
3) Follow the printed instructions.
• Press and hold the FEED button for the next option.
• Press and Release the FEED button to change the option.
• Power cycle to exit without changing.
• Press CONFIG to save and Exit
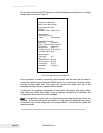
After you enter Configuration Mode, the printer will print the current configuration, the
current totals and the error logs, if any. Save this printout as a guide to changing the
configuration. It’s also useful in case you wish to return the printer to the previous
configuration.
Each emulation may have different configurable features. If you are changing the
emulation, note that the printout that was printed at the beginning of the configuration
process may be incorrect for the new emulation, and the configurable features may be
different. If you are using this printout as a configuration guide, and you are changing
the emulation, you may wish to save the new emulation and then re-enter
Configuration Mode to change other options. This will print all the available features
for the new emulation.
4 The CONFIG button is a multifunction button. By pressing and releasing the CONFIG
button, the printer will enter self test. By pressing and holding the CONFIG button for a longer
time, two additional features may be activated: pressing and holding the button for about two
seconds will enter hex dump mode, and holding the button for about 4 seconds will enter
configuration mode. To aid in selecting the correct mode, the Error LED will illuminate as soon
as the button is pressed and indicate that self test is selected. After about 2 seconds the Error
LED will go out and the PAPER indicator will illuminate, indicating that hex dump is selected.
After about 4 seconds, the Cover LED will illuminate, indicating that configuration mode is
selected.


