


Using Interface Boards
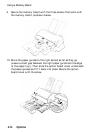
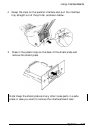
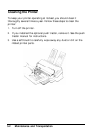
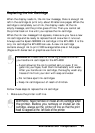
11. Attach the proper interface cable to the computer and to the
optional interface connector. Then turn the printer around.
CAUTION: After you install an optional interface board, be
sure to disconnect the interface cable from the printer’s
built-in parallel interface. Two interface cables must not be
connected at the same time.
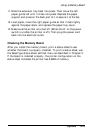
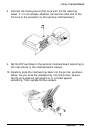
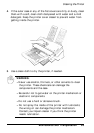
12. Make sure the printer is turned off. Then plug the power cord
back into the electrical outlet.
Setting up Your System
Before you use an optional interface board, you need to set up your
printer and computer for use with it.
To set up the printer, select parallel communication using the
SelecType interface menu as described in Chapter 2. Even if you
installed a serial interface board, you need to select parallel
communication because all the optional interface boards use the
printer’s internal parallel connections.
Note: The EPI-4000 is factory set for parallel communication, so
you do not need to select parallel communication using the
interface menu if you haven’t changed the original setting.
It may also be necessary for you to alter the communications
protocol of the computer so that it can communicate properly with
the printer. In most cases, you should use the information in your
optional interface manual or your computer manual to match the
computer with the interface.
To use the Coax or Twinax interface, you need to select LQ or FX
emulation mode from the SelecType printer mode menu as
described in Chapter 2. The printer supports these interfaces only in
LQ or FX emulation mode.
4-22
Options