


EPSON Stylus Pro GS6000 User’s Guide
The Control Panel
28
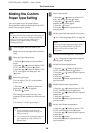
Making the Custom
Paper Type Setting
You can register up to 30 custom papers.
The registered number is displayed on the LCD
panel when using the printer.
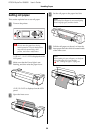
A
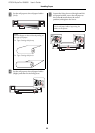
Load the paper that you want to use.
Make sure to set the paper that is actually
used.
B
Enter the Paper Setup menu.
1. Press the button to enter the Menu
mode.
2. Press the / button to display PAPER
SETUP, and then press the button.
3. Press the / button to display PAPER
SETUP once again, and then press the
button.
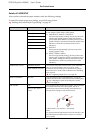
C
Select the paper type.
You can select STANDARD or the number
from 1 to 30.
1. Press the / button to select the
paper type you want to register.
2. Press the button.
The settings you make from step 4 are
registered in the number you have selected
here.
If you select STANDARD, go to step 6.
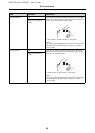
D
Select a print mode.
1. Press the / button to select PRINT
MODE, and then press the button.
2. Press the / button to select a
suitable setting for the paper.
3. Press the button.
4. Press the button to go back to the
previous menu.
E
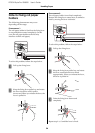
Set the paper feed adjustment, if necessary.
See “Adjusting Paper Feed” on page 48
F
Perform the head alignment, if necessary.
See “Aligning the print head using the
control panel” on page 47
G
Set the Pre Heater temperature.
1. Press the / button to select PRE
HEATER, and then press the button.
2. Press the / button to select a preset
temperature.
3. Press the button.
4. Press the button to go back to the
previous menu.
H
Set the Platen Heater temperature.
1. Press the / button to select PLATEN
HEATER, and then press the button.
2. Press the / button to select a preset
temperature.
3. Press the button.
4. Press the button to go back to the
previous menu.
I
Set the After Heater temperature.
1. Press the / button to select AFTER
HEATER, and then press the button.
2. Press the / button to select a preset
temperature.
3. Press the button.
4. Press the button to go back to the
previous menu.
Note:
The printer becomes in the Ready state when you press
the button at any point of making the following
settings. The settings you have made so far are
registered as the custom settings (including
unchanged settings).
Note:
❏ We recommend you write down the
registered number and the settings you
make from step 4.
❏ You can change the registered number on
your computer by using EPSON LFP
Remote Panel.
Note:
You can get a high-quality result if you print a
sample image using EPSON LFP Remote
Panel to set the value for Paper Feed
Adjustment.