


32
Setting Up Your Printer
Setting Up a Local Printer Using SAM
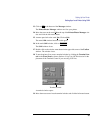
If you chose Add Serial (RS-232C) Printer/Plotter in the previous step, more
than one serial interface may be listed. The serial interfaces are listed in ascend-
ing order. The lowest numbered serial interface corresponds to the lowest num-
bered serial connector on your workstation. Choose the serial interface that
corresponds to the connector to which you have connected your printer. Place
the mouse cursor on the selected serial interface and click the left mouse button.
11 Click on OK.
12 A window opens. Click on the Printer Name box. Then enter the printer’s name
and press Enter.
13 Click on Printer/Model Interface.
14 A window opens. Move the mouse cursor onto the scroll bar slider at the side of
the new window. Press and hold the left mouse button while moving the mouse.
When the model name of your printer appears, release the left mouse button.
15 Move the mouse cursor to your printer’s model name and click the left mouse
button.
16 Click on OK.
The window closes and the Add Local Printer/Plotter window becomes visible
again.
17 If you want your printer to be set as the system default printer, move the mouse
cursor to the small box labeled Make this the system default printer and click
the left mouse button.
18 Click on OK.
19 A small window opens with a message that asks if you want to add your printer
to the “Printers” subpanel. Click on Yes.
20 Another small window opens with a message that asks if you want to restart the
workspace manager. With the left mouse button, click on OK.
21 If the print spooler was not previously running, a window will open with the fol-
lowing question:
Do you want to start the print spooler now?
Click on Yes.
22 A window appears asking if your printer is powered on, has paper, is connected
to your workstation, and is online. Check your printer to make sure it meets these
requirements.
Click on OK.