


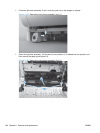
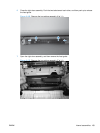
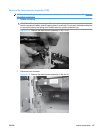
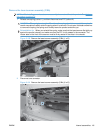


Remove the laser/scanner assembly (Y/M)
NOTE: After installing a new laser/scanner assembly, be sure to calibrate the product. See Calibrate
the product on page 313.
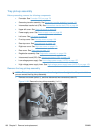
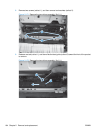
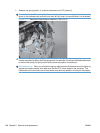
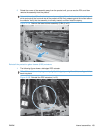
1. Release one spring.
CAUTION: The spring is not captive. Do not lose the spring when it is removed. Use a pair of
needle-nose pliers to safely retain the spring when it is removed. Do not use a flat blade screwdriver
to remove the spring; the spring could forcibly leave the product and strike you.
Figure 2-175 Remove the laser/scanner assembly (Y/M) (1 of 5)
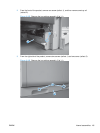
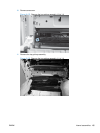
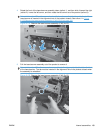
2. Disconnect one connector.
Figure 2-176 Remove the laser/scanner assembly (Y/M) (2 of 5)
ENWW Internal assemblies 187