


Installing and Removing Printer Options
Appendix C: Installing and Removing Printer Options ❖ C-49
Installing the DNIC
Note
Be sure to read Chapter 2 of the DNIC-E’NET Configuration
Guide for important network connection instructions.
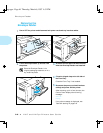
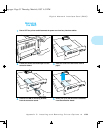
1
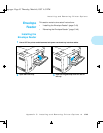
Power OFF the printer and disconnect the power cord and any interface cables.
• If installing the DNIC-E’NET, continue with Step 2.
• If installing the DNIC-L’TALK, skip to Step 3.
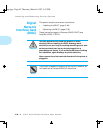
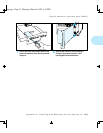
2
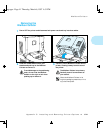
Note the DNIC-E’NET serial number (A)
and Ethernet address (B).
This information will not be
accessible after the card is installed.
Pins 2 and 3 on JX1 (C) must be
strapped together for proper
operation of the DNIC-E’NET.
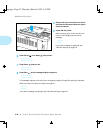
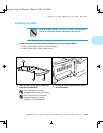
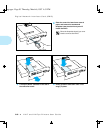
3
Loosen the thumb screws and pull out the
controller board.
kug-appc Page 49 Thursday, March 6, 1997 4:51 PM