


v S00-BH-J9
5. Disconnect the switch data cable at the tailgate of the frame containing the processor node.
6. Connect the end of the processor node data cable to the jack.
7. Run advanced diagnostics on “css0” on the “test” processor node and its associated switch port.
v Do not perform the cable wrap test.
v Refer to ″Running diagnostics in a processor node″ in
RS/6000 SP: System Service Guide
.
8. Look for an SRN indicating a clock problem (such as “External clock”).
9. Do the “css0” diagnostics fail with an indication of a clock problem?
v If yes, go to “Step 0620-031”.
v If no, go to “Step 0620-030”.
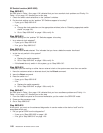
Step 0620-030
The “css0” diagnostics do not fail with an indication of a clock problem. This indicates that the problem is
either in a cable or in the reported SP Switch.
1. Replace switch data cable that originally supplied the switch clock to the failing SP Switch.
2. Set the switch clock selection on this SP Switch to the original (correct) setting.
3. From the control workstation of the primary node reinitialize the switch by entering:
Estart
4. Check /var/adm/SPlogs/css/out.top file to see if problems are still reported on all data cables
connected to this SP Switch.
5. Are there still problems reported on all data cables connected to this SP Switch?
v If yes:
a. You have isolated the clock problem to the reported SP Switch.
b. Return to “Step 0620-028” on page 1-31.
v If no:
a. Clock problem resolved for this SP Switch.
b. Go to “Step 0620-042” on page 1-35.
Step 0620-031
The “css0” diagnostics fail with an indication of a clock problem. This indicates that there is a problem with
switch clock source SP Switch.
1. Replace clock card in the clock source SP Switch.
2. Make sure to reconnect all cables connected to the clock card.
3. Set the switch clock selection on this SP Switch to the original (correct) setting.
4. Return to “Step 0620-028” on page 1-31.
Step 0620-032
The clock settings on the problem switch appear to be okay and the problem switch is mounted in a frame
that also contains processor nodes.
1. Check the ground straps connected to the “problem” frames.
v Ground straps are connected at bolts near the cable escapes inside the bottom rear of each frame.
v For a view of a ground strap connection, refer to
RS/6000 SP: Installation and Relocation
.
2. Do all ground straps connecting the frames make adequate contact at both ends?
v If yes, go to “Step 0620-033” on page 1-33.
v If no:
a. Fix or replace ground strap between the frames.
b. Go to “Step 0620-043” on page 1-36.
SP Switch function (MAP 0620)
1-32
RS/6000 SP: SP Switch Service Guide