


Operator’s Guide
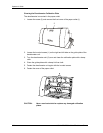
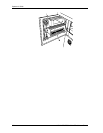
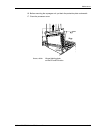
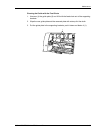
4. Lift the BX rack far enough so that the hinged holding plate can rest on the metal
bracket to let the chemical solution drip from the rack.
5. Remove the dripped racks, put them in the tray supplied as accessory and take
them to a lab basin.
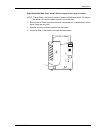
6. Remove the splash guard from the CD rack.
Then repeat the above procedure with the CD rack.
7. In the lab basin, rinse the racks first in cold water, then in warm water (maximum
40 °C).
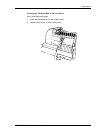
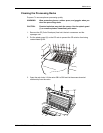
8. Clean the rollers and gears on the outside with warm water and a soft brush;
remove any crystal deposits that may stick to the lateral drive gears.
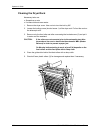
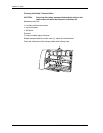
9. Dismount the guide elements to clean the inside rollers. For this, press together
the bearings clipped into the side parts at the catches and take them out.
On the CD and BX racks, dismount in addition the four styrodur displacers
mounted in holders on both sides.
10. Clean the rollers with a soft brush. Clean the guide elements with a lint free cloth
and warm water.
11. Let the racks drip dry.
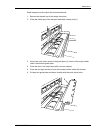
Mount the guide elements; clip the bearings of the guide elements safely into the
plates.
Mount the displacers and fasten them safely in the holders.
12. Check the smooth movement of the racks by turning the drive gear.
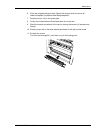
13. Check the drains at the back of the tanks. Remove any crystallization that may
be there.
14. Insert the cleaned racks slowly into the tanks in the correct order.
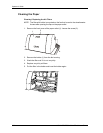
15. Clean the CD feed unit, the crossovers and the squeegee unit and put them
back.
8-28 KODAK PROFESSIONAL RP 30 Laser Printer