


Setting up network printing
3
C550 3-19
Installing the printer driver (Windows Vista)
1 Insert the printer driver CD-ROM into the computer’s CD-ROM drive.
2 Click the [Start] button, and then click “Control Panel”.
3 Click “Hardware and Sound”, and then click “Printers”.
– If the control panel is in the classic view, double-click “Printers”.
The Printers window appears.
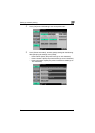
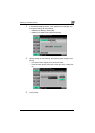
4 Click “Add a printer” on the toolbar.
The “Add Printer” dialog box appears.
5 Click “Add a network, wireless or Bluetooth printer”.
The printer that is connected is located.
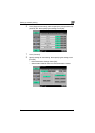
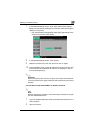
6 In the dialog box of the located printer, click “The printer that I want
isn’t Listed”.
7 In the “Select a shared printer by name” text box, enter the URL for this
machine in the following format, and then click the [Next] button.
– http:// <IP_address_for_this_machine> /ipp
Example: If the IP address for this machine is 192.168.1.20
http://192.168.1.20/ipp
– If specifying settings for IPPS printing, enter “https://
<host_name>.<domain_name>/ipp”. For the <host_name> and
<domain name>, specify the name that was registered in using
DNS server.
– If the certificate of this machine is not issued by a certificate author-
ity, it is necessary to register the certificate of the machine in Win-
dows Vista as a certificate of the Trusted Publishers for the
Computer account. When the certificate is registered to this ma-
chine, check that <host_name> and <domain_name> is displayed
in common name of the certificate.
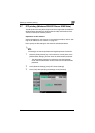
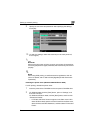
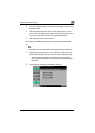
8 Click the [Have Disk] button.
9 Click the [Browse] button.
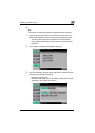
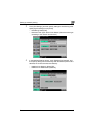
10 Specify the desired folder on the CD-ROM that contains the printer
driver, and then click the [OK] button.
Select the specified folder according to the printer driver to be used,
the operating system, and the language.