


Chapter 7 Disk Array Configuration Setting
IV-93
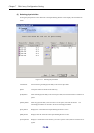
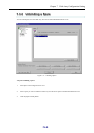
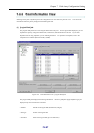
<When you select individual component of a basic pool>
Detailed information about the pool is displayed on the [Logical Disk] tab and [Physical Disk] tab:
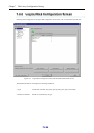
y [Logical Disk] tab
The [Logical Disk] tab shows a list of logical disks bound in the pool. You can rename the logical disks,
change the format time, and unbind the logical disks on this tab.
y [Physical Disk] tab
The [Physical Disk] tab shows a list of physical disks that compose the pool.
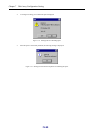
<When you select Spare>
The spares already set up are listed. You can unbind spares on this screen.
<When you select Unused>
Physical disk(s) that remain unassigned to any pool or spare are listed.
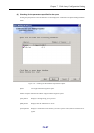
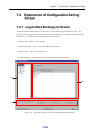
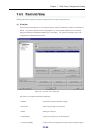
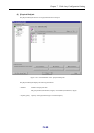
(C) Binding Wizard area
This area provides the following buttons for binding a pool, logical disks, and a spare:
y [Pool Binding] button
Starts the wizard for binding a pool. Bind a new pool following the steps on the wizard.
y [LD Binding] button
Starts the wizard for binding logical disks. Bind logical disks following the steps on the wizard. For details
on how to bind logical disks, refer to 7.2.1 “Binding Logical Disks”.
y [Spare Binding] button
Starts the wizard for binding a spare. Set an unused physical disk as a spare following the steps on the wizard. For
details on how to bind a spare, refer to 0 “
Binding a Spare”.
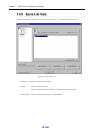
The following buttons start a wizard for binding a volume for snapshot operation. These buttons are available
with a valid DynamicSnapVolume license
For how to bind volumes, refer to the “Snapshot User’s Manual (Function Guide)” (IS030).
y [SRA Binding] button
Starts the wizard for binding an SRA (snapshot reserve area). Bind a new SRA following the steps on the
wizard.
y [Generation Adding] button
Starts the wizard for adding a generation. Add a generation following the steps on the wizard.
y [LV Binding] button
Starts the wizard for binding a link-volume. Bind a link-volume following the steps on the wizard.