


Chapter 8 Disk Array Configuration Setting (S100/S1100/S1200/S1300/S2100/S2200/S2300)
IV-121
8
8
8
.
.
.
2
2
2
.
.
.
4
4
4
L
L
L
o
o
o
g
g
g
i
i
i
c
c
c
a
a
a
l
l
l
D
D
D
i
i
i
s
s
s
k
k
k
B
B
B
a
a
a
t
t
t
c
c
c
h
h
h
S
S
S
e
e
e
t
t
t
t
t
t
i
i
i
n
n
n
g
g
g
All the physical disks or unused physical disks mounted on the disk array are specified and all the logical disks are
bound in the same RAID type with the same LD Capacity. Please note that when binding all physical disks, if the
required data has been stored in the operating disk array, the data recorded in all the logical disks in use is erased.
Please be careful about it. If the data in use are necessary, select unused physical disks or bind logical disks newly
from unused physical disks through individual bind.
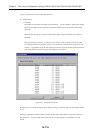
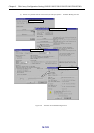
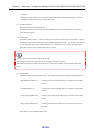
There are the following four logical disk configurations which can be selected.
• High reliability: RAID1 (1+1) Consisting of two PDs, the RANK Capacity is the same as that of about one
PD.
• Standard: RAID5 (4+P) Consisting of five PDs, the RANK Capacity is the same as that of about four
PDs.
• Large capacity: RAID5 (6+P) Consisting of seven PDs, the RANK Capacity is the same as that of about six
PDs.
• Huge capacity: RAID5 (8+P) Consisting of nine PDs, the RANK Capacity is the same as that of about eight
PDs.
The LD Batch Binding refers to bind multiple logical disks in a batch in accordance with simple parameter instructions
such as the RAID type and the number of logical disks. The procedure and precautions for its execution are described
below.
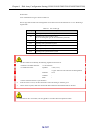
To collectively bind logical disks, selecting all physical disks, first unbind all configurations already made.
Therefore, please note that all the RANKs and logical disks that are already bound will be unbound.
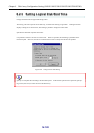
(1) Execution procedure
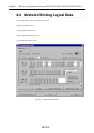
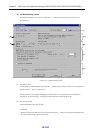
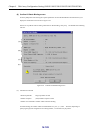
The procedure for Batch Binding of logical disks is as follows. The screen transition is shown in Figure 8-21.
(i) Select the disk array from the iSM client main screen and then start [Configuration] from the menu or from
the toolbar.
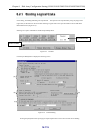
(ii) Click [Setting] from the “Select Operation Mode” dialog.
(iii) Click the [LD Bind] button on “Configuration- [Setting Mode]” to display the LD Batch Binding screen.
(For details of the LD Batch Binding screen, refer to 8.2.4 (5) “LD Batch Binding screen”.)
(iv) Set the necessary item on the LD Batch Binding screen and then click the [OK] button to output the LD
Batch Binding Confirmation screen. (For details of display items, refer to 8.2.4 (6) “Confirm LD Batch
Binding screen”.)