


Management and Configuration
AXIS 5900 User’s Manual 109
4. Click OK to create the network group.
You can edit the properties of each network group from the Network
Groups page. Simply select the network group from the list and use one of
the Edit, Copy or Remove commands.
Managing
Print Servers
Follow the instructions below to access the print server using AXIS
ThinWizard:
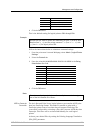
1. Click Manage Network in the main menu.
2. Select the network group, including the, from the drop-down list. All AXIS
servers included in the network group appear in the window.
3. Click the link of the AXIS 5900 to access its internal Web page.
4. The ‘Srv’ and ‘Dev’ columns show the status of your print servers and printers.
Changing the IP
Settings
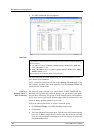
Using AXIS ThinWizard you can also set or change each print server’s IP
parameters.
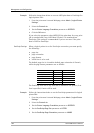
1. Click IP Settings in the main menu.
2. Select print server in the list.
3. Enter your data: IP address, Subnet mask, Default gateway and the print
server’s password (default password is pass).
4. Click Set to save your settings.
5. Click Rescan to update AXIS ThinWizard and see the changes.
If Your Print Server is
not Shown in the List
If your print server is not shown in the list, click “Click here...”. By
entering the serial number of the print server (found on the underside
label) you will be able to set the print server’s IP parameters.
Example: 00408c181cf0
Upgrading
Axis Servers
Refer to “Using AXIS ThinWizard for Print Server Management” on page
107 for more information about upgrading Axis servers using AXIS
ThinWizard.
Multiple
Configuration and
Installation
Using AXIS ThinWizard it possible to change the settings of several Axis
servers simultaneously. It is also possible to copy the configuration from
one server to another. This is a convenient way to install a new server,
based on the settings of an already existing server.
For additional information, please refer to the AXIS ThinWizard online
help.