


Basic Installation (Wired & Wireless)
20 AXIS 5900 User’s Manual
3. If the host returns Reply from 192.168.3.191 ... or a similar
message, the IP address has been set successfully.
Interrupt the “ping -t” loop by pressing CTRL+C on your keyboard.
If the host returns Request timed out ...
you need to perform a Factory Default on the print server and perform steps
1-3 above again. See Performing a Factory Default, on page 134.
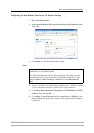
4. Log in to the print server’s Web pages (see Using a Web Browser for Print
Server Management, on page 92), select Admin | Network Settings |
Detailed View | TCP/IP Network and define the Default Router and Subnet
Mask.
You have now set the IP address of the print server. Continue to
Configuring the Axis Network Print Server for Wireless Printing, on page
23.
Important:
Setting the IP Address
using ARP in UNIX
and Mac OS X
Start out with making sure that the IP address is available for use. The IP
address 192.168.3.191 is used here as an example:
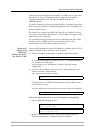
• Ping the IP address by opening a Terminal and writing:
If the host returns Reply from 192.168.3.191 ... or a similar
message, the IP address is already taken.
You can obtain a new and unused IP address from your system
administrator.
• Check that the IP address you want to use is not already taken and
stored in the host’s cache memory.
Open a Terminal and write:
If the host lists the IP Address followed by the Physical Address, then
the IP address is in use.
You can remove the entry from the cache memory with the command:
Follow the instructions below to set the IP address using arp/ping.
• The ability to set the IP address with ARP and PING will only be enabled the first 10
minutes after restarting the print server.
• When you execute the ping command for the first time, you will experience a significantly
longer response time than usual.
ping 192.168.3.191
arp -a
arp -d 192.168.3.191