


Adding Printers in NetWare
66 AXIS 5900 User’s Manual
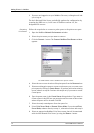
Setup using iPrint
iPrint is Novell's next generation of printing software that lets users print
to and from all destinations.
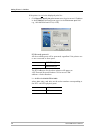
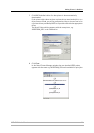
A standard Web page displays available printers to the user.
By clicking a printer, the iPrint client is installed (if not installed
previously), the printer's driver is downloaded, and a printer is created in
the user's Printer folder, enabling the user to send documents to the
printer from any application on the desktop.
Before setting up iPrint printers, make sure that you meet all the iPrint
Setup requirements. See the Novell iPrint Administration Guide for
instructions on installing, configuring, and customizing iPrint.
AXIS Print servers can be installed as iPrint printers, either by using the
Novell LPR gateway (LPR on IP) or the AXIS Gateway Configuration
Snap-in for iPrint.
Axis provides two free Snap-ins for iPrint:
• AXIS LPR Gateway Configuration
• AXIS IPP Gateway Configuration
When you install Service Pack 6 (16 April 2003) for NetWare 5.1 or later
and Service Pack 3 (16 April 2003) for NetWare 6.0 or later, the AXIS LPR
Gateway Configuration will automatically be installed and configured on
the NetWare Servers and ready for use.
The AXIS IPP Gateway Configuration Snap-in for NetWare 6.0 can be
downloaded for free from www.axis.com. Follow the instructions below
to install the AXIS IPP Gateway Configuration Snap-in for NetWare 6.0,
if you want to add it in your iPrint environment.
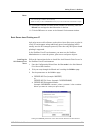
Installing AXIS IPP
Gateway
Configuration Snap-
in for NetWare 6.0
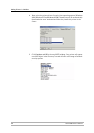
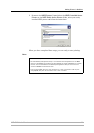
1. Download the free axisIPP-snap-in.zip file from www.axis.com and unzip
it in a temporary directory.
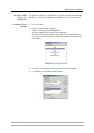
2. Make sure the the NetWare Enterprise Web Server was previously installed
on the server. Otherwise, install it.
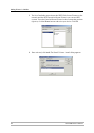
3. Novell iPrint uses the NDPS infrastructure, so make sure that all the NDPS
requirements have been met:
• Make sure that the BROKER.NLM is loaded. If it isn’t, type LOAD
BROKER in the server console prompt and select the name of the
Broker.
• Make sure that the NDPS Manager object is created in the Novell
Directory Services (NDS) tree. Refer to your Novell documentation
for creating this object.
• Make sure that the NDPSM.NLM is loaded. If it isn’t, type LOAD
NDPSM in the server console prompt and select the appropriate
NDPS Manager.