


Adding Printers in NetWare
AXIS 5900 User’s Manual 67
4. Shutdown Tomcat and the NetWare Enterprise Web Server on the NetWare
file server by executing the following commands:
Type "NSWEBDN" <Enter>
Type "TOMCAT33 -STOP" <Enter>
Type "NVXADMDN" <Enter>
5. Map the next available drive (e.g. G:) to the root of volume SYS on your
NetWare server.
From the temporary directory where axisIPP-snap-in.zip has been
unzipped, run the batch file AxisIPP.bat (default G:).
If the drive G: is not available, you have to edit the batch file and change
the drive to next available one.
Check that each line in the batch file is executed without failure.
6. Restart Tomcat and the NetWare Enterprise Web Server on the file server
by executing the following commands:
Type "TOMCAT33" <Enter>
Type "NVXADMUP" <Enter>
Type "NSWEB" <Enter.
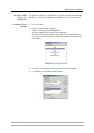
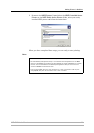
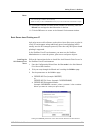
7. Access the iManager Web page on the NetWare server by opening the
following URL:
https://<IP address of NW server>:2200/eMFrame/iManager.html
You have to authenticate.
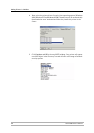
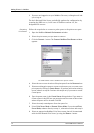
8. Click on iPrint Management on the left pane and select Create Printer.
9. On the right pane, verify that the newly installed AXIS IPP Gateway
Configuration is under the Gateway type drop-down menu.
If not, it may be necessary to restart the NetWare server.
Now you are ready to use the AXIS IPP Gateway Configuration for installing
iPrint printers. You have to have Administrator rights to install the printers
through iPrint.
Install a Printer with
AXIS IPP Gateway
Configuration Snap-
in
1. Connect a printer to any port of the AXIS 5900.
2. Connect the print server to the network.
3. Connect the power adapter.
4. Start the printer and the print server.
5. Log in as Admin.
6. Use a Web browser and the local host URL to login into iManager on your
NetWare server.
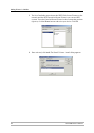
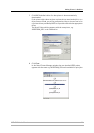
7. Open your browser to the following URL:
https://<IP address of NW server>:2200/eMFrame/iManager.html
You have to authenticate.
8. Click on iPrint Management on the left pane.