


Adding Printers in Windows
AXIS 5900 User’s Manual 37
Adding Printers over TCP/IP in Windows NT using AXIS Print Monitor
1. Install AXIS Print Monitor on all workstations that will print via the print
server. AXIS Print Monitor is available free of charge on www.axis.com
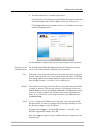
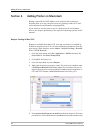
2. To start the Add Printer Wizard, select Settings | Printers from the Start
menu and double-click the Add Printer icon.
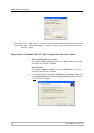
3. The Wizard asks you to select My Computer or Network printer server.
Select My Computer, click Next.
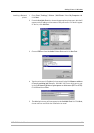
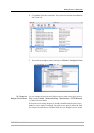
4. Click Add Port... In the Available Ports dialog, select AXIS Port and click New
Port...
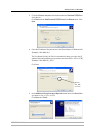
5. Select LPR (TCP/IP) as your choice of protocol and click OK.
6. Enter the IP address or the host name of your print server (Example: enter
an IP address: 192.168.3.191 or a host name: AXIS181636).
In the Logical Printer Name field, enter the port you wish to use; LPT1 or
LPT2. Click OK, click Close.
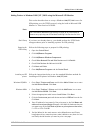
7. Select Manufacturer, Printers, choose a printer name and if you want to use
the printer as your default printer. Choose if you want to share the printer
and print a test page. Click Finish.
8. You may now configure the port, as described below.
Configure the Port: 1. Select Settings | Printers from the Start menu and highlight the printer
you wish to configure. Select File | Properties | Ports and click Configure
Port.
2. Choose whether error condition pop-up messages are to be displayed by
checking the box in the Configure AXIS Ports dialog. Define the frequency
at which the error messages should be displayed after retry. Click OK.
Even if the desired printer is available in the Manufacturers and Printers lists, you are advised
to use the print driver provided with the printer. This assures you of the latest driver software.