


Chapter 1-
1-2
Polycom® RSS™ 4000 Installation and Preliminary Configuration
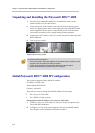
Unpacking and Installing the Polycom® RSS™ 4000
1 Place the Polycom® RSS™ 4000 unit on a stable flat surface in the
selected location, not for rack mount.
2 Insert each power cord connector into the rear of the unit and connect
each to an appropriately rated socket outlet. The Polycom® RSS™ 4000
unit is supplied with two power cords, BOTH power cords should be
connected to the mains power supply during normal operation.
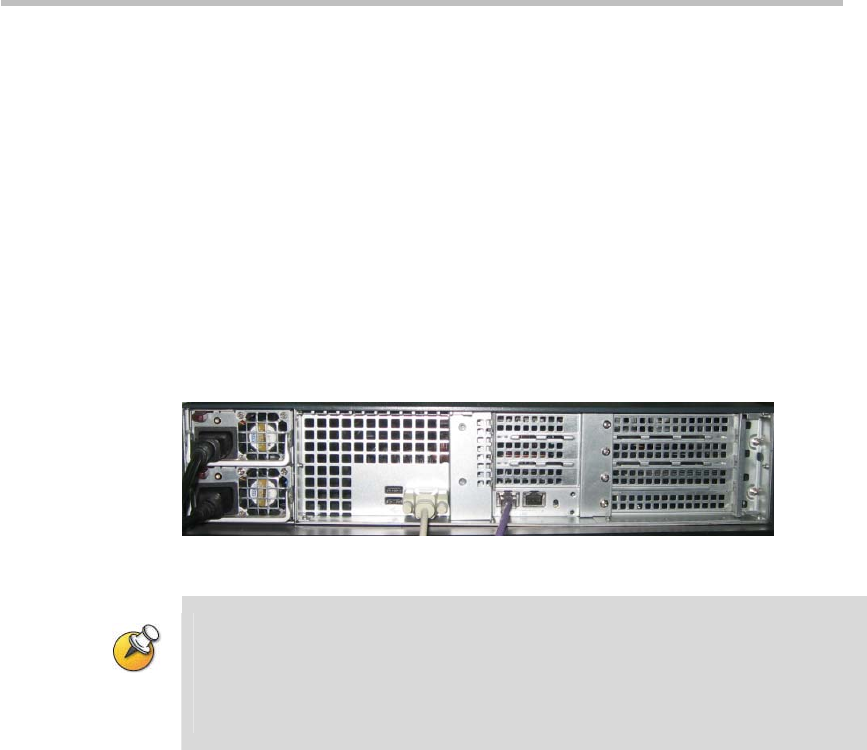
3 Connect the LAN cable to LAN 1 port on the rear panel of the Polycom®
RSS™ 4000 unit.
4 Turn on power switch.
Figure 1-2 Connecting cables
Plug Acts as Disconnect Device:
The socket outlets to which this apparatus is connected must be installed near the
equipment and must always be readily accessible.
In order to fully isolate the equipment then both power cords should be
disconnected otherwise the system will remain energized.
Initial Polycom® RSS™ 4000 IP Configuration
The system is shipped with a default IP address:
IP Address: 192.168.1.254
Subnet Mask: 255.255.255.0
Gateway: 192.168.1.1
There are two ways to change the initial IP address of the system:
Via a cross over LAN cable
Via a RS232 or Telnet Console.
Changing the initial IP address via a cross over LAN cable
1 Connect a cross over LAN cable to LAN 1 port on the rear panel of the
Polycom® RSS™ 4000 unit..
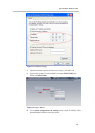
2 Configure your PC to the same segment of the Polycom® RSS™ 4000.
For example, set the IP address as that shown below: